Ford Falcon XR6 Turbo Ute – Part 5
Now we’re up to Part 5, the fabrication is nearing completion and we’re starting to see some fresh colour being laid down.
Previous instalments: Part 1 - Part 2 - Part 3 - Part 4
All text and images taken with permission from http://www.nulonnationals.com.au/2016/04/21/xr6-turbo-ute-part-4/ with some edits
This week has been a very busy one with the ute build, with a lot of travel, man hours and a few favours from friends all over Sydney. We had an aim to get it painted, all fitted up and ready to wire the Haltech within the week.
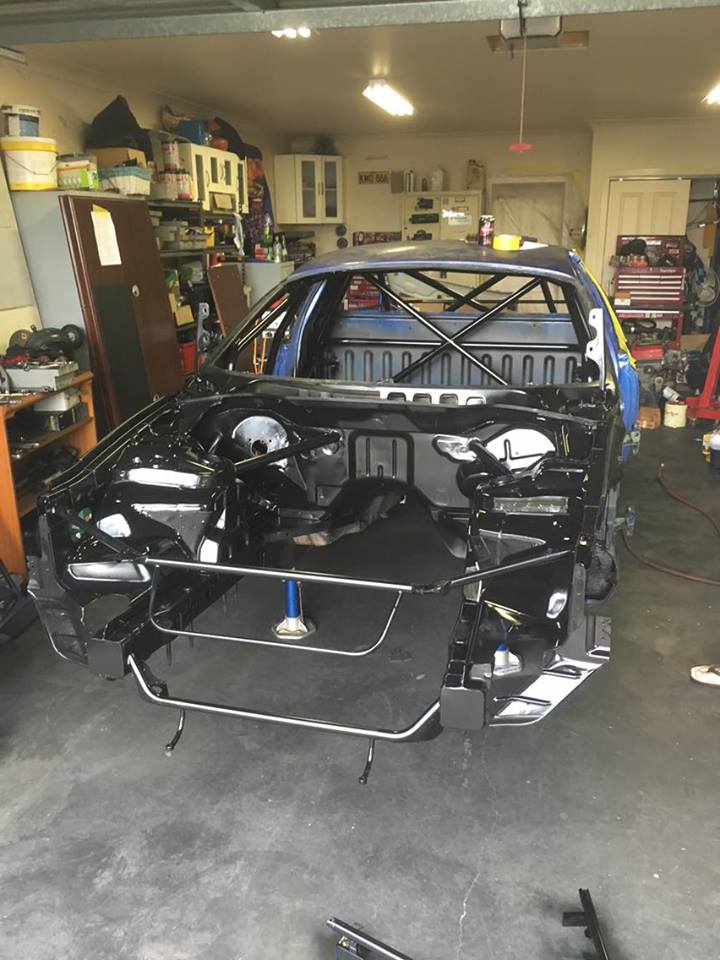
With the ute making its way back to Porters garage it was time to start stripping the chassis to prep for paint. First step was to remove all the body panels, leaving a just a shell and all the bar work. The rear tub comes off with 6 bolts now, which makes it super easy to get access to the rear end.

With one team working on removing the engine and the other removing the rear end, we were ready to start paint prep in no less than 1 hour.

Once the ute was on jack stands and the rear end stripped it was time for Porter and the boys to start prepping the roll cage. The more time you spend on prep the better the paint job will end up, so if you ever take on something like this in your shed or garage, spend as much time as you can prepping.

Hot Tip number 5: Child labour is real and very affordable. We paid Zac 16 cents p/h to scotch-bright the entire cage.

Sharman on the other hand paid us to work on the car, finishing off the rear end and putting $80 into our beer account.

With the cage and rear chassis all prepped it was time to paint. Colour was decided; it will be going black cage with silver cabin. The entire car will also end up silver, but for now we just want to get it running so we can give it a good shakedown.

Kicking the family cars out of the garage and covering the entire place with black paint is much easier to do when the wife isn’t home. This was key to the success of this home spray job.

While the gun was out it was time to give the cradle some loving as well, it came out brand new.
Once the front end got some love, it was really starting to gain some momentum. Ian and the gang now just had to work out a way of getting that big donk in there without scratching it.

With the engine bay, roll cage and rear end all painted up, it was time to give the cabin a fresh coat. First up they had to tape up all the cage so they didn’t give it a camo look. Porter decided to go a factory Ford colour in Lightning Strike silver.

The more we paint, the more we learn about covering up personal possessions. Not only did the bay and rear end get covered this time, but we also made an attempt not to paint any more of the surrounding garage. The cabin came out amazing and the black on silver theme is going to really stand out.

With all of the painting done on the car, we could turn the paint guns onto the suspension parts, including arms, hubs, knuckles and the diff.

After seeing the results of the cage, going for black and silver suspension parts was the only option.

It’s always the most fun part of any build when you can start bolting parts back on for the final time. The rear end is in and looks amazing.

Custom BC Shocks from Just Jap should give some great feedback and they don’t hurt the bank account too much.

Fuel cell with pump and filter was fitted next. We decided to mount the filter on top of the tank for easy access with the tub on.
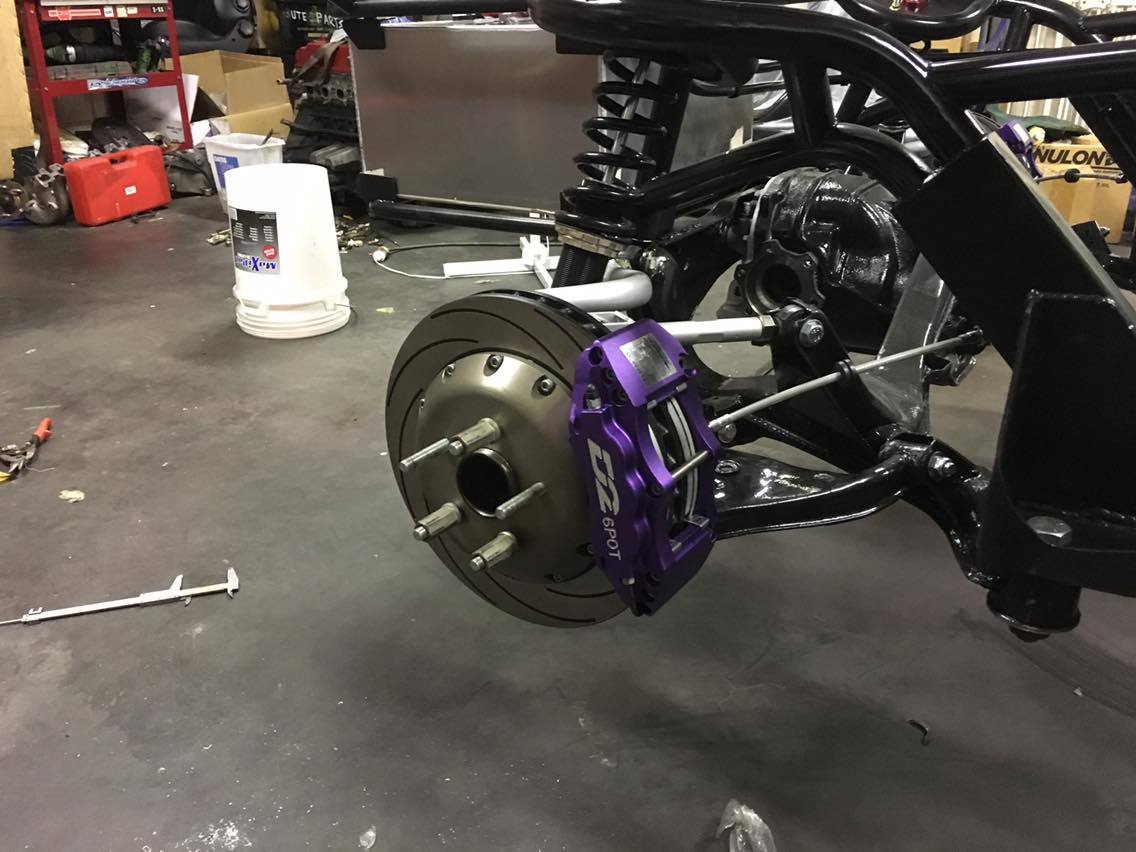
New brakes trial fitted and were perfect, 6 pot rears should do the job. With more parts arriving every hour, this thing was really taking shape fast.

Luckily Porter has a few plumber mates to call on when it comes to running the hard fuel lines. Mat from Baxter Performance Plumbing (BPP) was on hand to knock out the fuel system, he was born to use pipe, this was all done by hand in a matter of minutes. Highly recommend getting in touch with him for all your fuel system requirements.
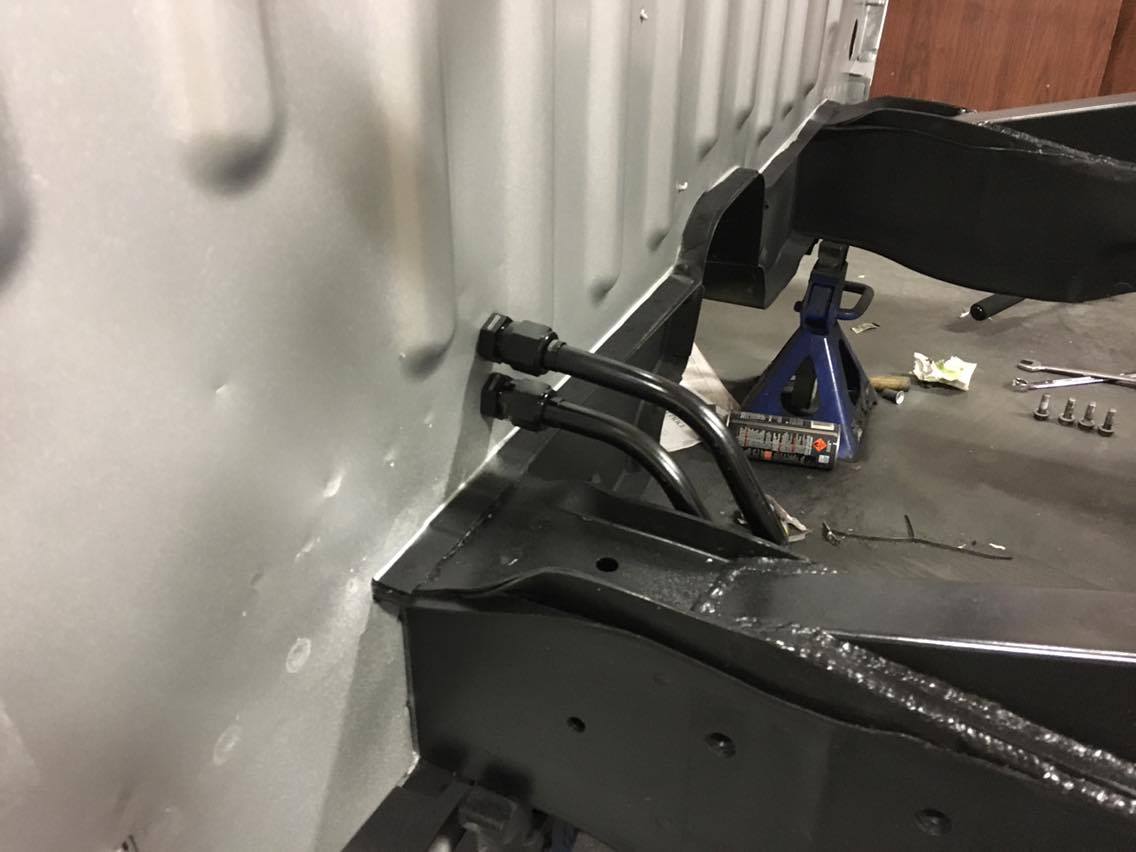
It was easier and safer to go through the cab, rather than underneath and risk hitting the fuel lines on something considering the amount of time Ian will spend off track in this thing.

This is fast becoming the best view of the car. With the rear end complete it was time to set the attention onto that big donk of a motor.

Once the engine was in it was time to fit the Plazmaman intake as well as the new fuel system.

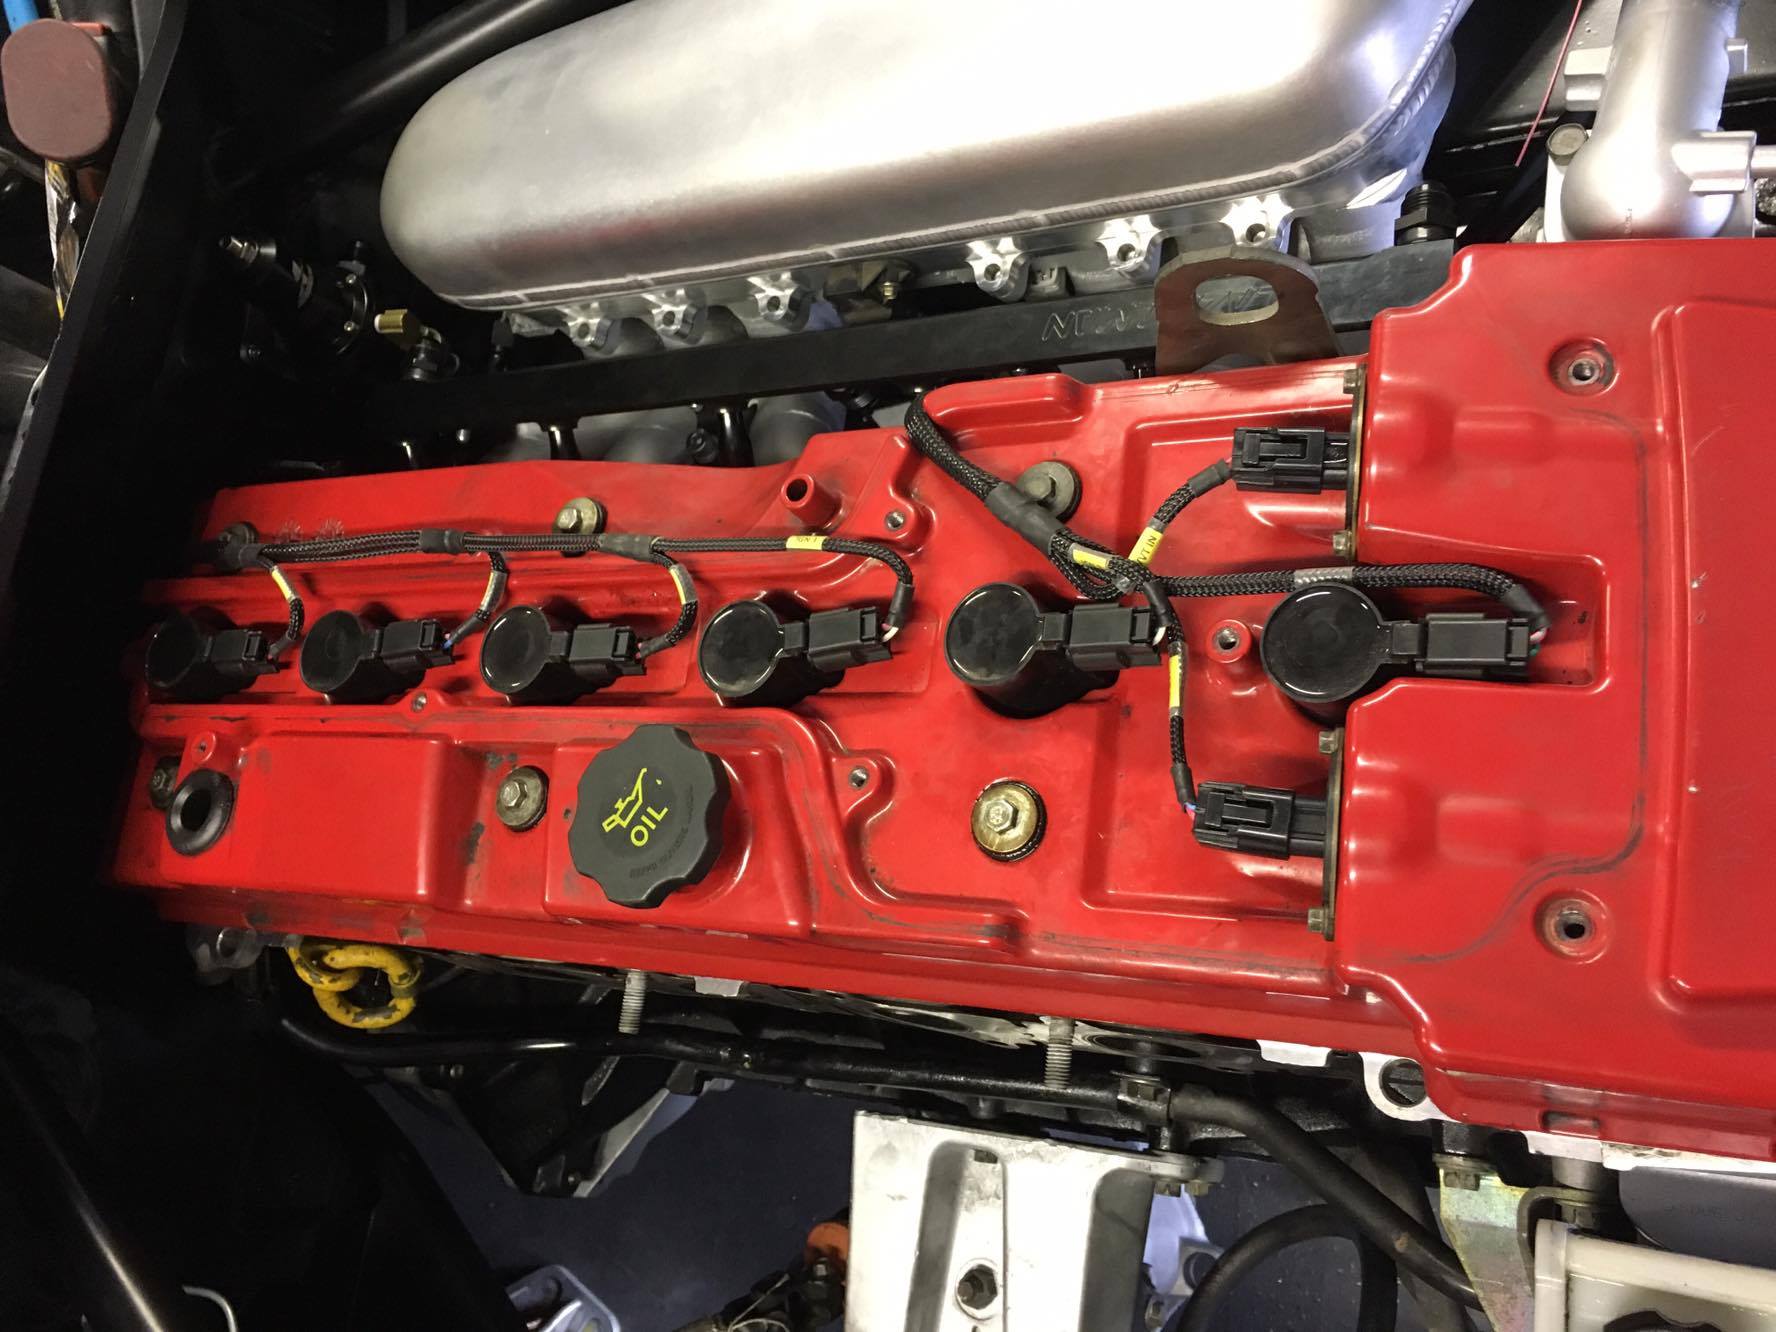
With the plan of ethanol being used, we needed big injectors. We also went out and got a Plazmaman top feed fuel rail, these are a high quality kit that was very easy to install.
With the motor in place, we could start the wiring for spark and fuel, We decided to go with the Haltech Elite 2500. This will give us total control over every aspect of the tune, including some super science traction control that we will get into in the next blog post.
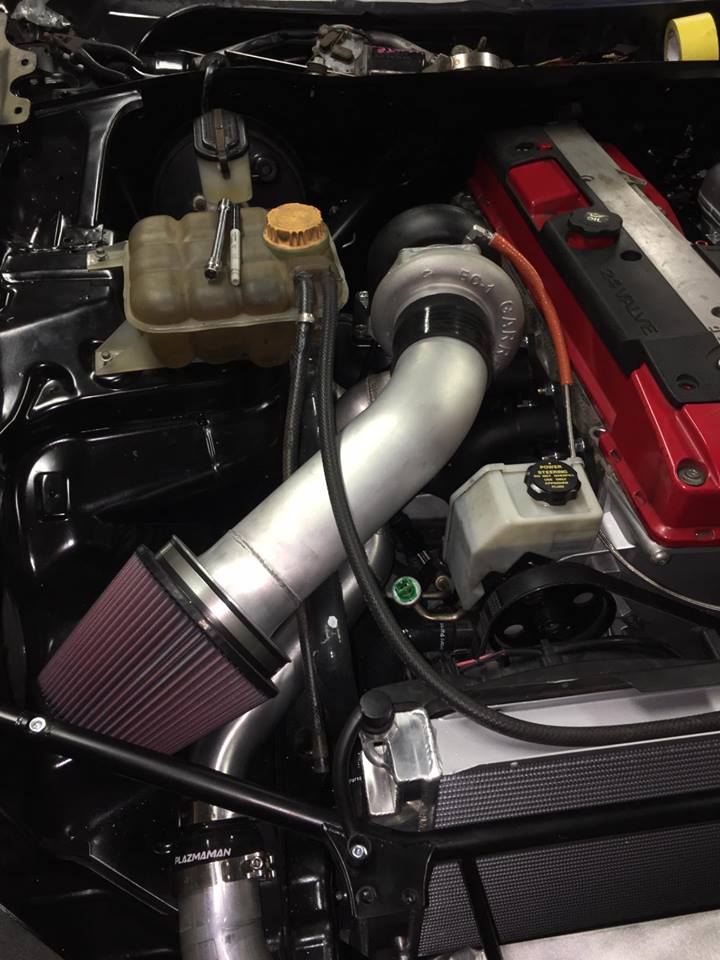
Once the radiator was mounted, it was time for the cooler and turbo kit. To control boost we have gone with another Australian brand in Turbosmart. Using 2 of their 50mm Pro Gates. Running a twin gate setup like this gives you great control over boost pressure while maintaining clearance between the turbo and the tower which is a big problem in this car.

With the final fitment well under way, we can see the benefit of planing out your cooler and turbo position. Minimal bends and short pipework will increase the efficiency of this turbo while giving us really good pedal control.

Next up we are going to get the Haltech Elite installed and hook the battery up. Not long now until we will be turning the key of this crazy ute build.
For more information on this build or some of our events around Australia, please go to www.nulonnationals.com.au