Project 510: Interior Refresh
With this site now into it’s tenth year, that means my ownership of Project 510 is into it’s 11th. In the early years I pushed hard to knock out a lot of the “big ticket” items, like wheels, suspension, ECU, FMIC, etc. Now that I’m older and (questionably) wiser, I’m trying to tidy the car up, make it a nicer place to be in, and consider what I want it’s “final form” to be. Apart from seats and a steering wheel, I’ve neglected the interior, until now…
You might remember from a previous post, I fitted two different pairs of seats to the car, first some pretty extreme Spats fixed-back buckets, and then some more streetable Cobra Classic RS. At the end of that post I mentioned some concerns I had about the new Cobras, and as much as I loved them, I decided to make the tough decision to let them go. The great news is they went to a good home, and will be sitting proudly in a restored longhood Porsche 911 soon.

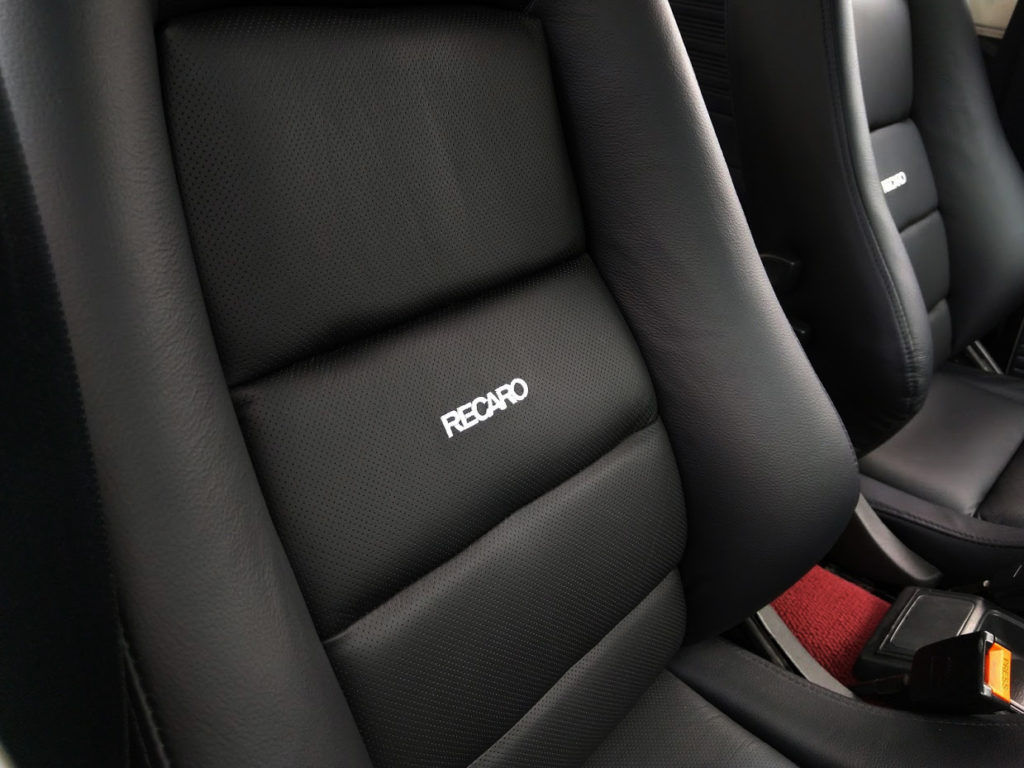
Thinking long and hard about what I wanted to replace them with, and not wanting to go through the pain of fitting seats any more times than I needed to (it’s not a fun job), I decided to search for a pair of the desirable old-school Recaro recliners, namely the LX range.

As luck would have it, I jumped on the bandwagon at exactly the wrong time, right when their popularity around these parts had gone through the roof and taken prices with it. After missing out on a few pairs on our local classifieds, I found the Recaro Max Facebook group, and managed to purchase a pair of Recaro LX-C from Ricardo that needed some attention. This is the ideal situation for myself, as my father is a retired upholsterer.
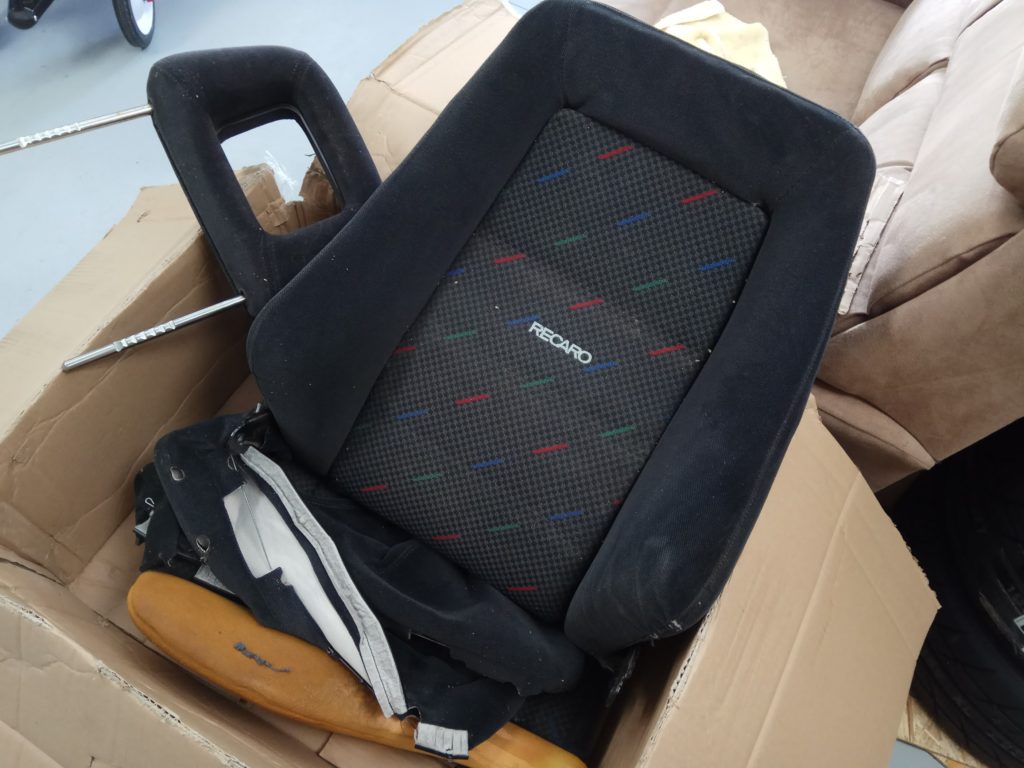
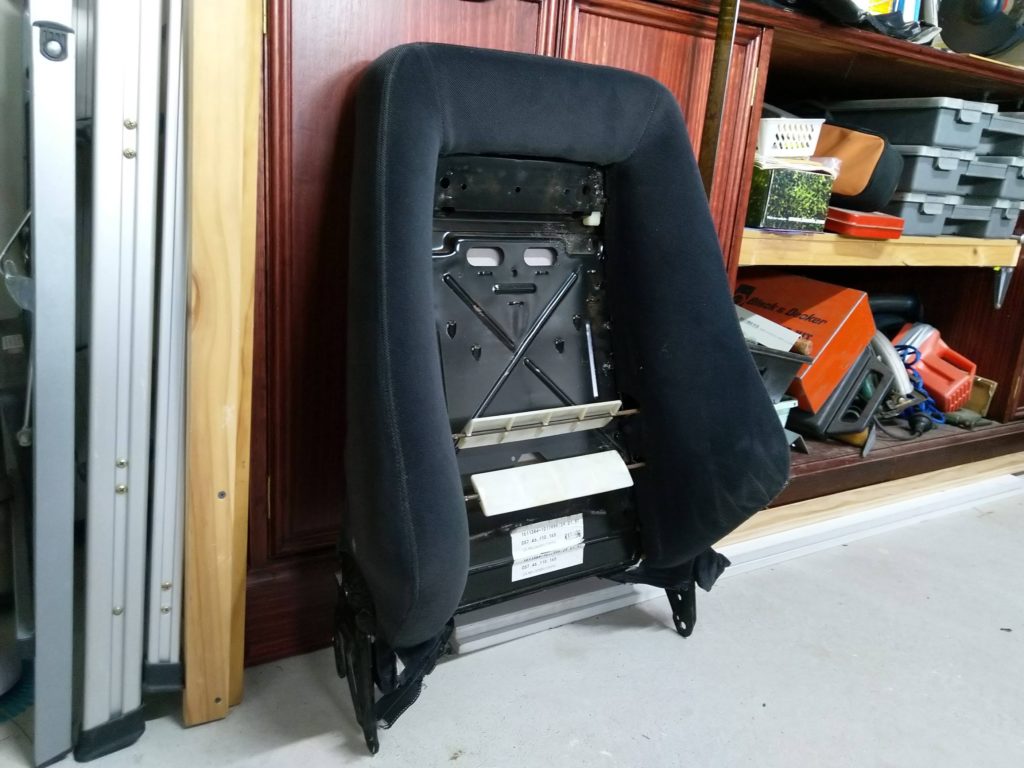
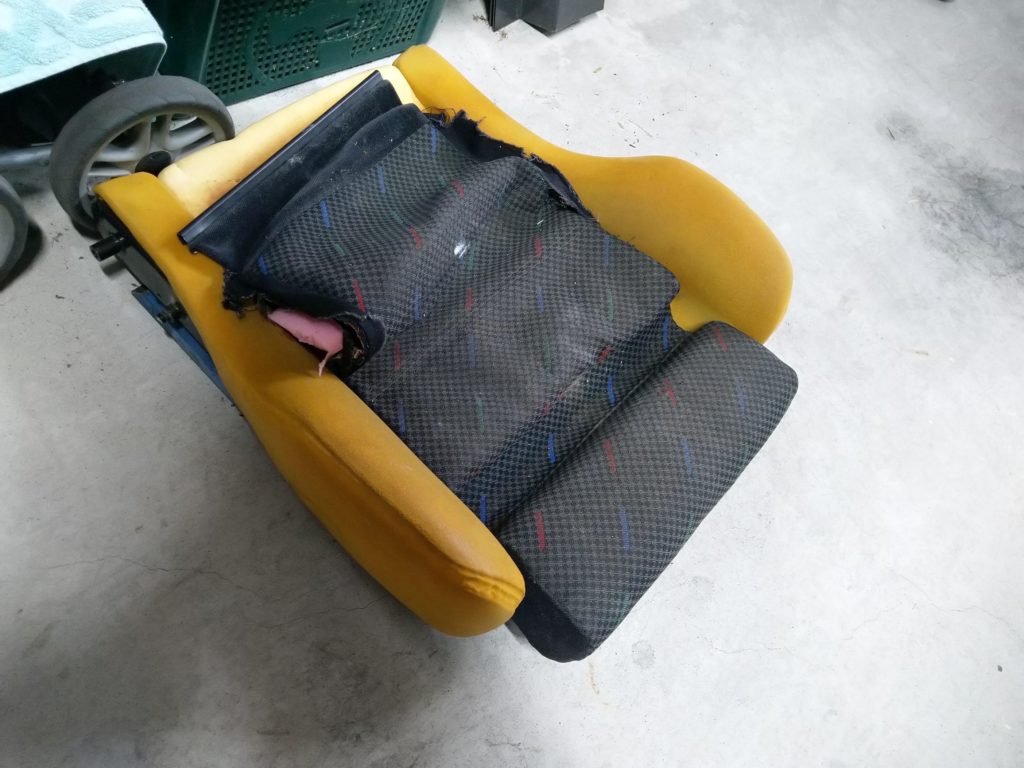
A few weeks later the seats arrived from Poland, and a bit further down the track I set about fitting them to the car in their tired state, before they were to be re-trimmed, so I need not worry about damaging them.

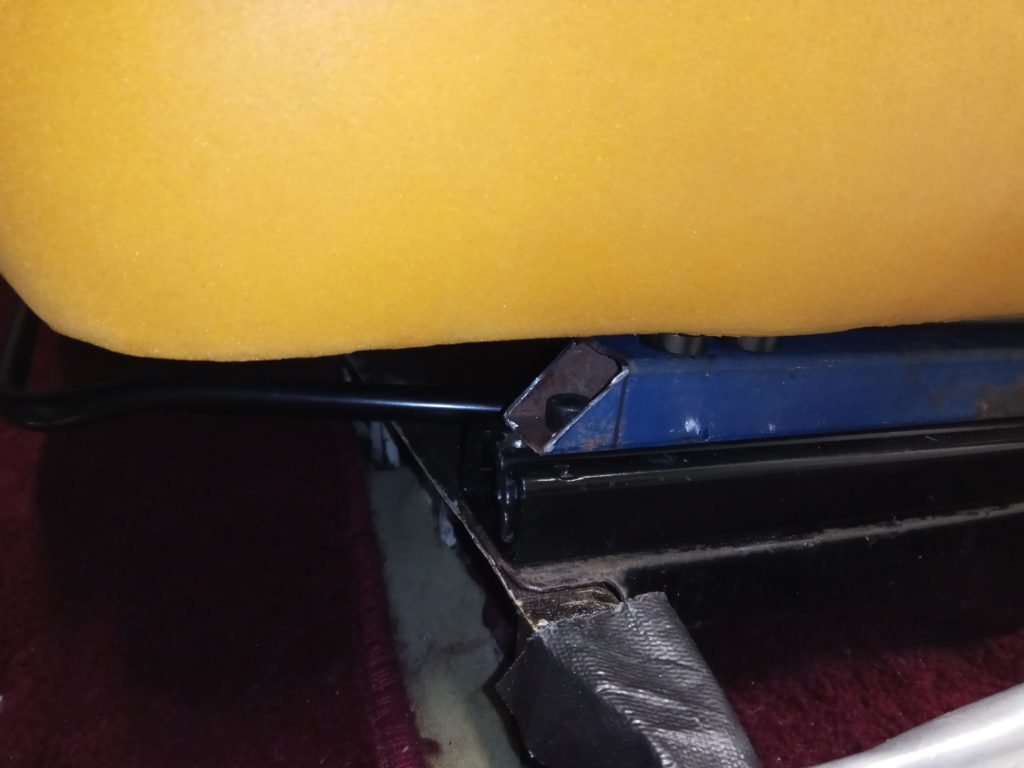
I used some lengths of 25mm box tubing to create an adapter/riser, to connect the seat bases to the sliders. It also set the seat at the perfect height for me.
A test fit confirmed I was on the right track. They looked great, felt great, and provided enough support for a spirited drive while still being adjustable.
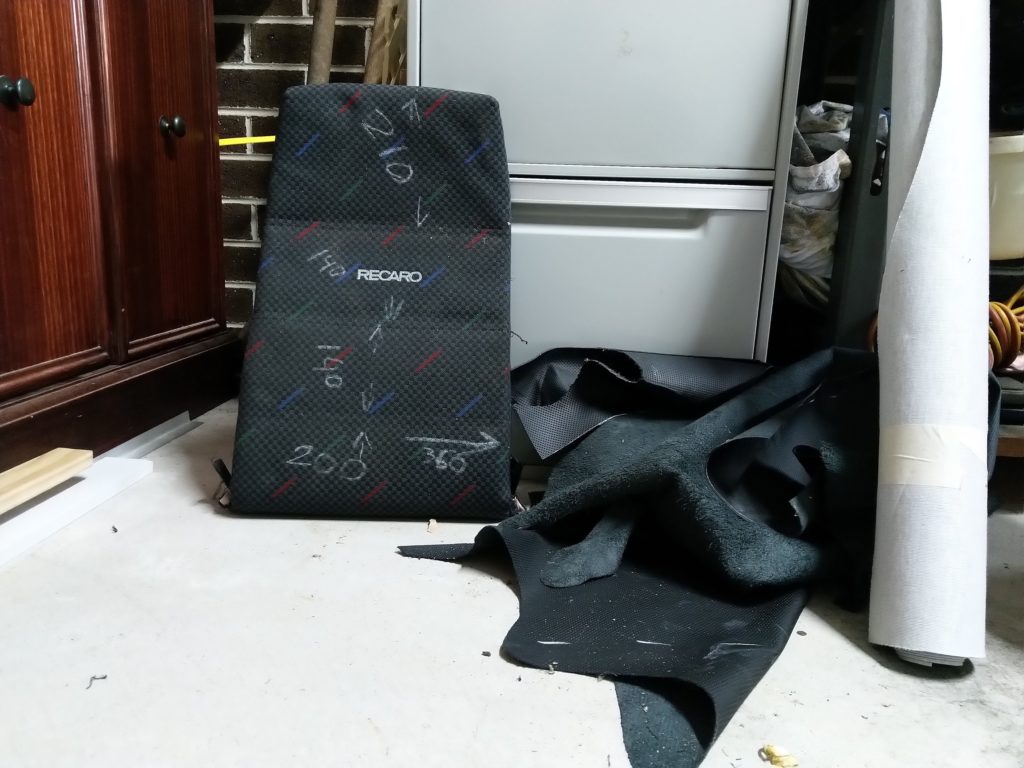
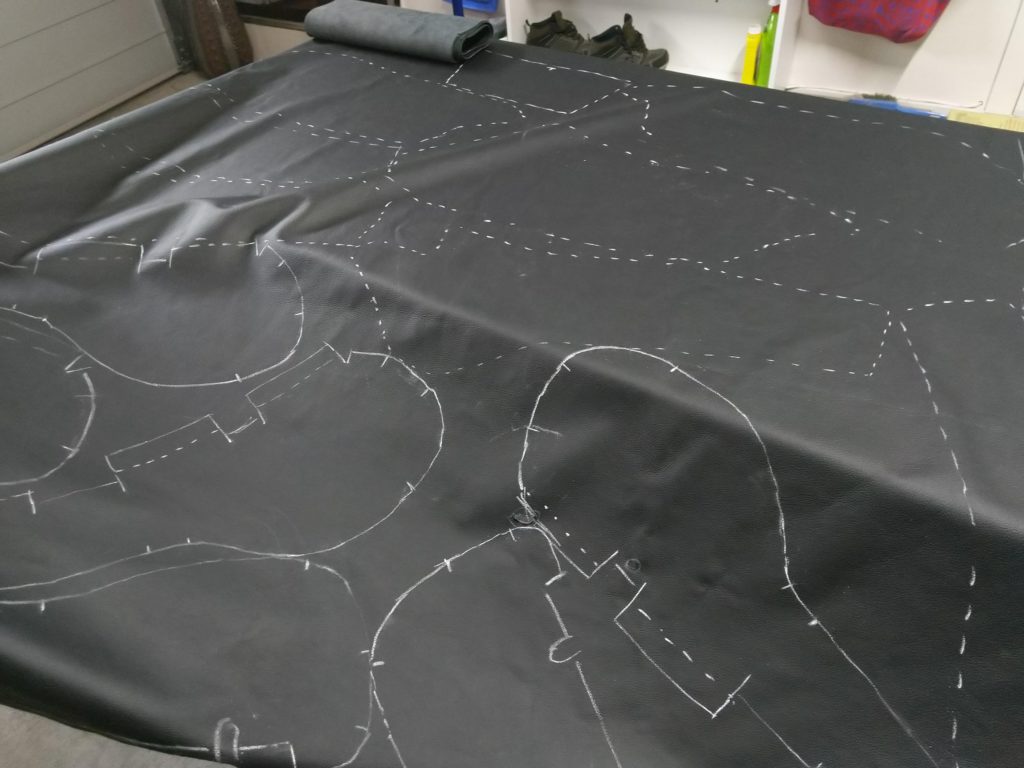
Once I knew they fitted up sufficiently, it was time to hand them over to my dad to do his work. I’ll admit it took me a while to decide on what type of fabric I wanted to use, but after much deliberation I ended up with the following combination:
– Leather side bolsters
– Perforated leather inners
– Vinyl sides and backs (any area that wouldn’t come into contact with the person sitting on the seats). The vinyl helps to keep the cost down, but I made sure to choose a type that closely matched the leather in both colour and texture.
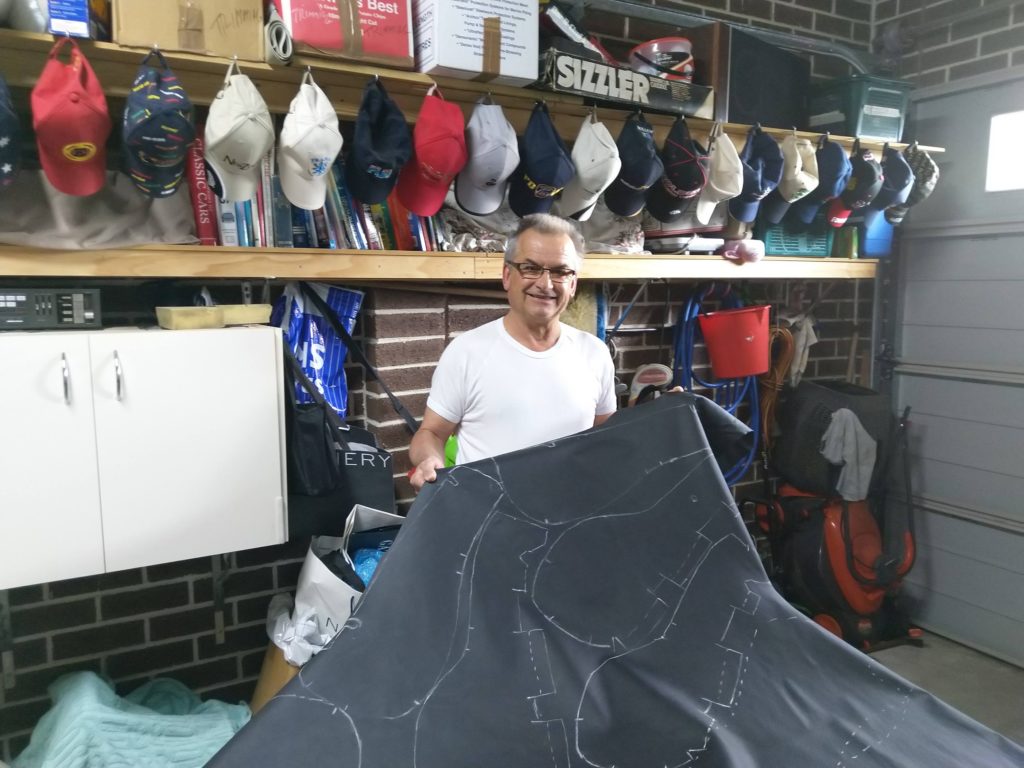
I’m very proud to have my dad’s handiwork as a main feature of the car.


While he was busy with upholstery work, I measured the Recaro logo and sourced a vector file to take to an embroidery shop.
After a few different trials on scrap material, we settled on a stitching technique and applied it to the two back pieces.

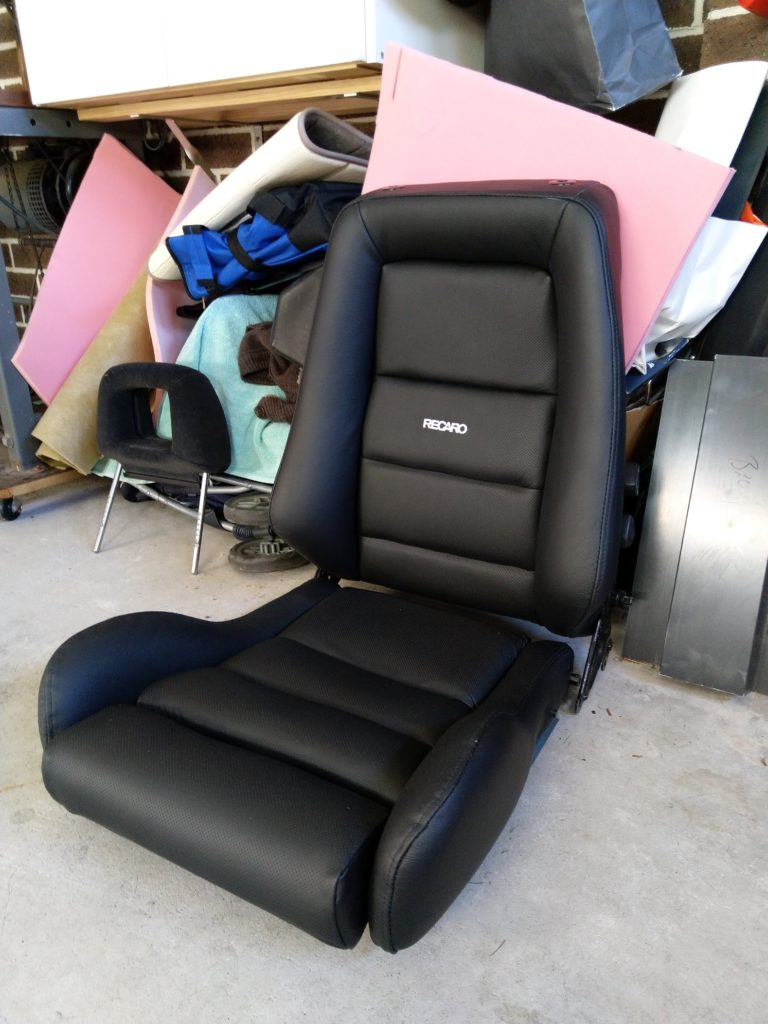


Just after Christmas last year, I brought the seats home in their new finish, to say I was ecstatic would be a severe understatement! The only thing I can think of to improve them would be some mesh headrests, but the prices for those items alone are almost as much as what I paid for the seats. If I can track a pair down in the future for a fair price, it wouldn’t be hard to swap them out.
The work, however, had only just begun.
With a deadline looming, it was time to bring the rest of the interior up to scratch to be worthy of those amazing seats. Years prior I had already purchased a moulded carpet kit, reproduction scuff plates, some door-trim blanks and new kick panels. It was time to get them off the shelf and start the fitting process.
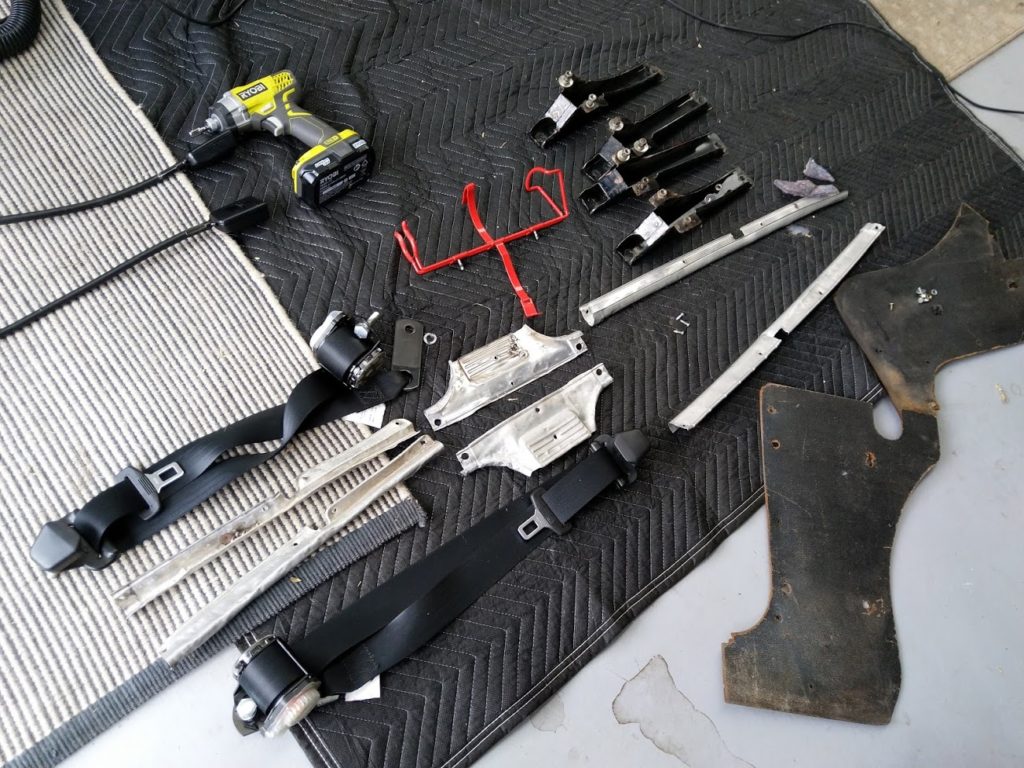
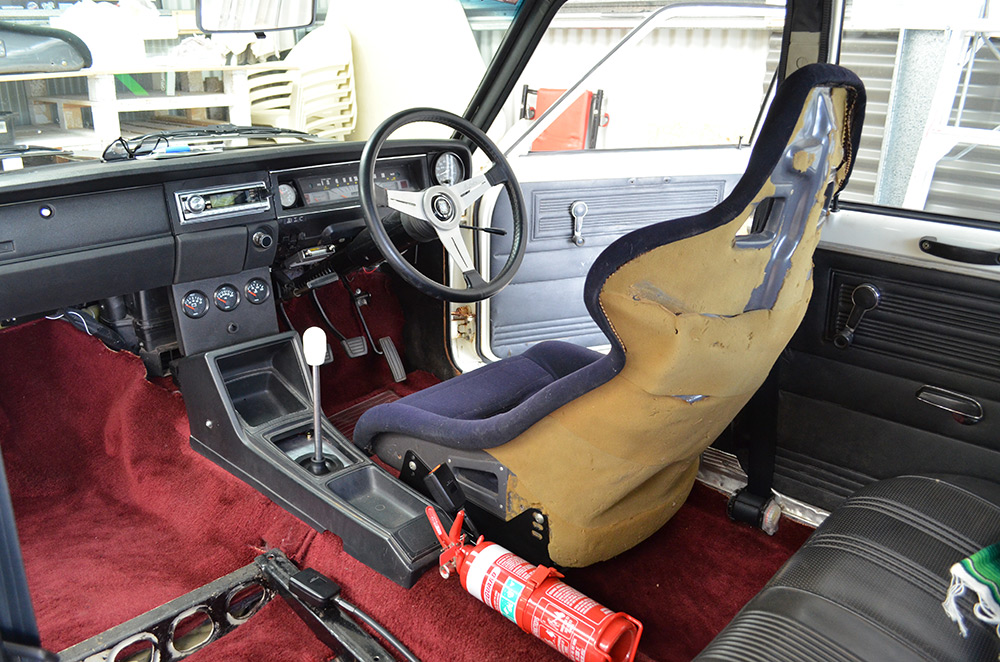
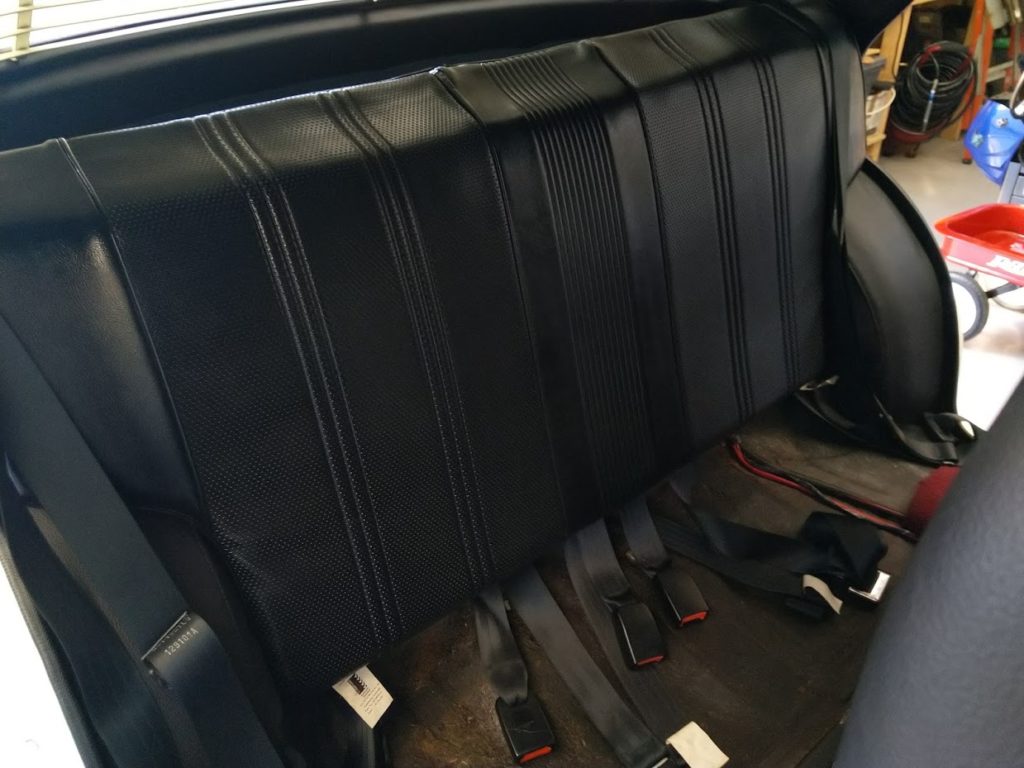
First step, strip the interior. Old carpet, seat belts, scuff plates, seat brackets, fire extinguisher, rear seat, and kick panels.
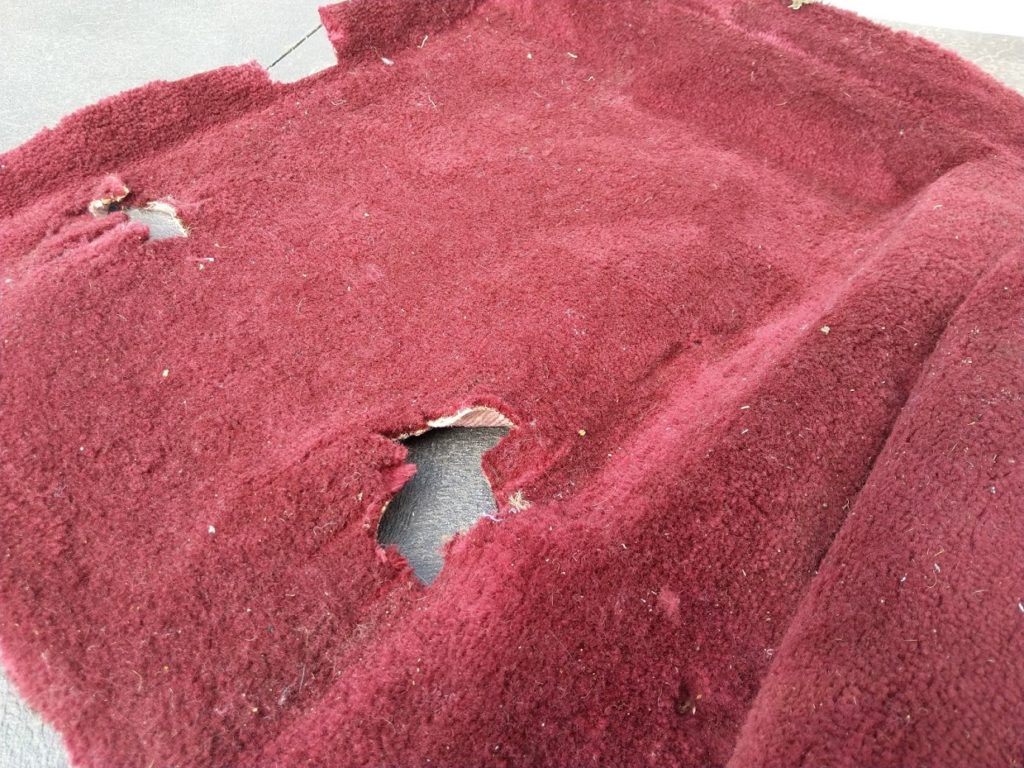
The old carpet was “Plush Pile”, but I ordered “Loop Pile” as my replacement, as I think it suits older cars better, which you’ll see in the photos below. For some reason my car has always had dark red carpet, I’m not entirely sure why, as these cars usually pair red carpet with a full red interior. Whatever the reason, it’s kind of become part of the car’s DNA, so I made sure to order my new carpet in the same colour.
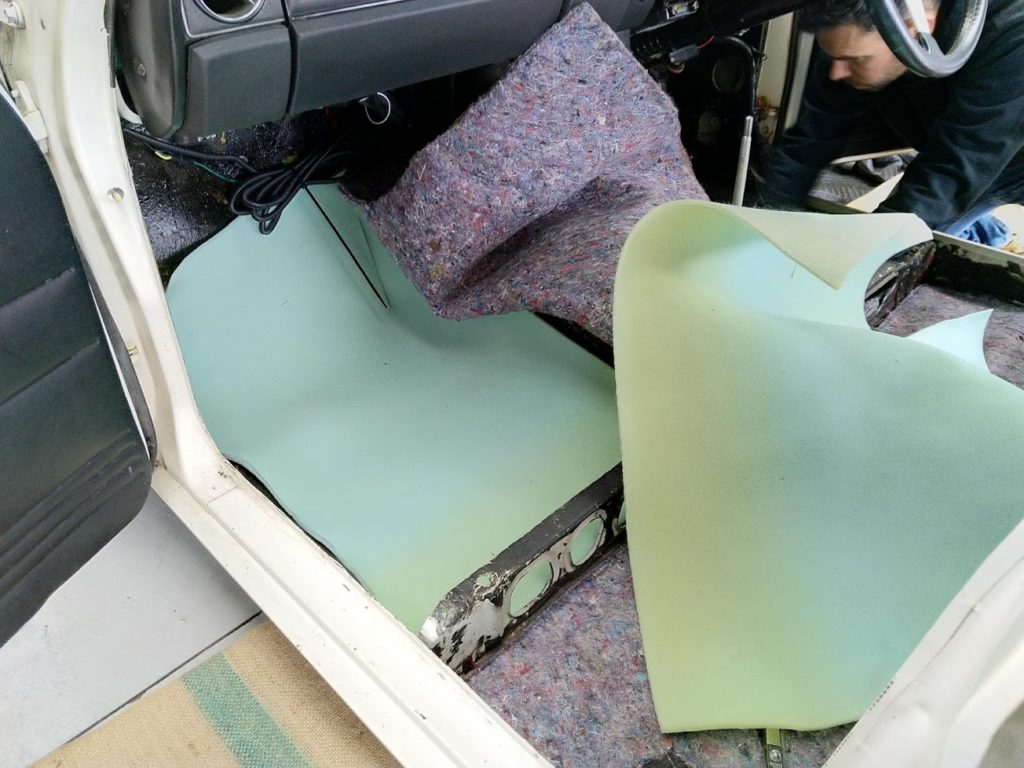
I’m very lucky that the person I bought this car off many years ago had done a lot of great work, including tarring the floorpan and adding underlay. Both of these were still in good condition, so I just replaced some foam that had deteriorated and trimmed things down to size a bit better.

One drawback of the tar, however, is that it doesn’t always “set” properly in certain conditions. This was apparent on the front seat crossmembers.
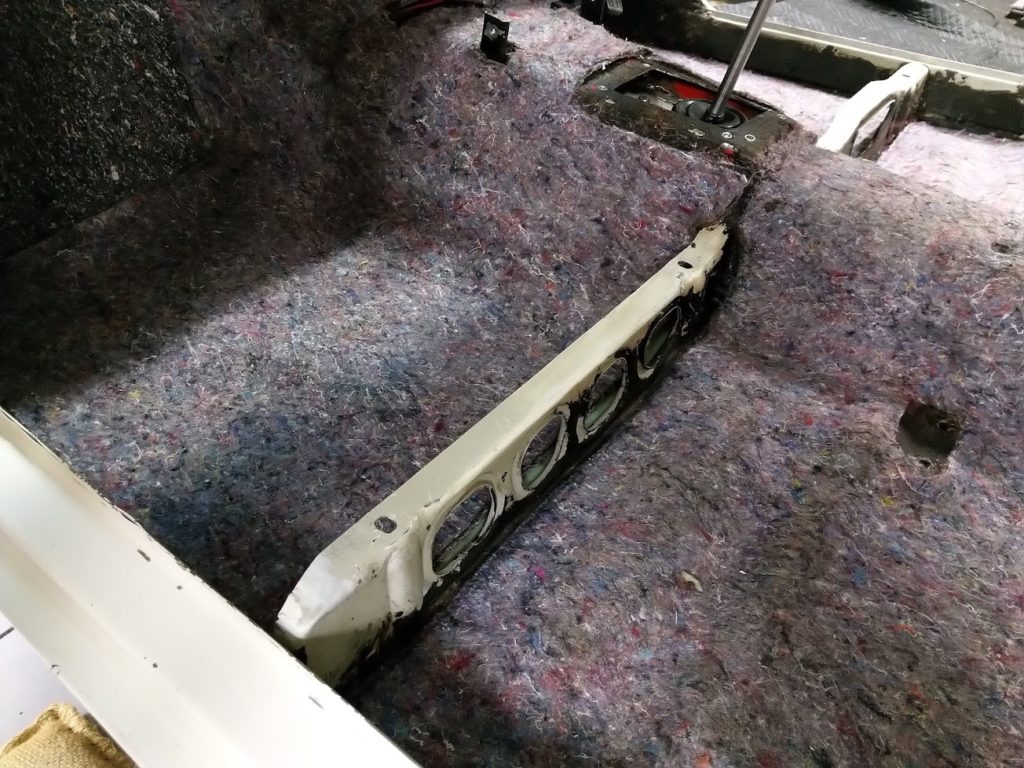
Luckily with a bit of turpentine on a rag and some elbow grease, it comes right off and exposes the factory finish.


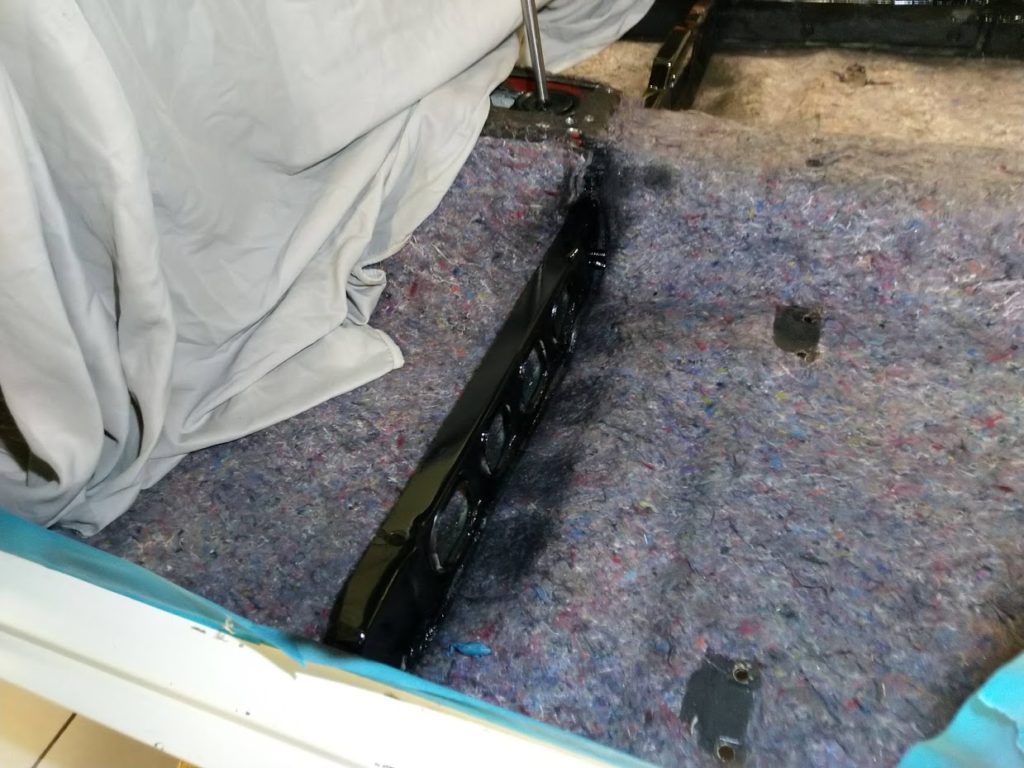
Once the tar was cleaned up, we identified the areas that might show through once the interior is back together, and hit them with a coat of black. When I say “we”, I mean myself and my mate Chris, who owns the 2-door 510 you might have seen in some older pictures. Chris was instrumental in helping me complete this interior overhaul.
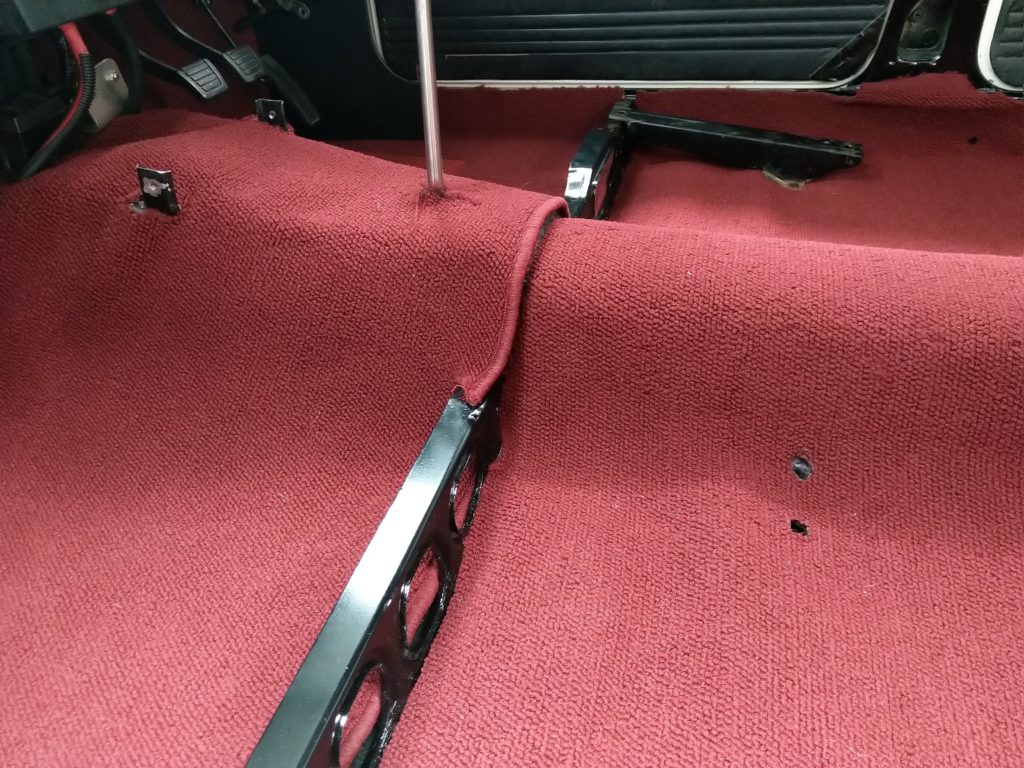
With that out of the way, it was time to fit the carpet. Definitely one of the more difficult jobs to complete on a car. Being an aftermarket moulded kit, there are no holes for things like the shifter, seat bolts, etc, so you need to cut them out yourself. I learnt a neat trick off YouTube where have one person under the car who pokes a large needle through the bolt holes and through the carpet, then a second person sits inside the car and uses a hot soldering iron to poke holes back through where the needle is. It leaves a neat hole and also seals the carpet at the same time, meaning you don’t get any frayed bits of fabric.
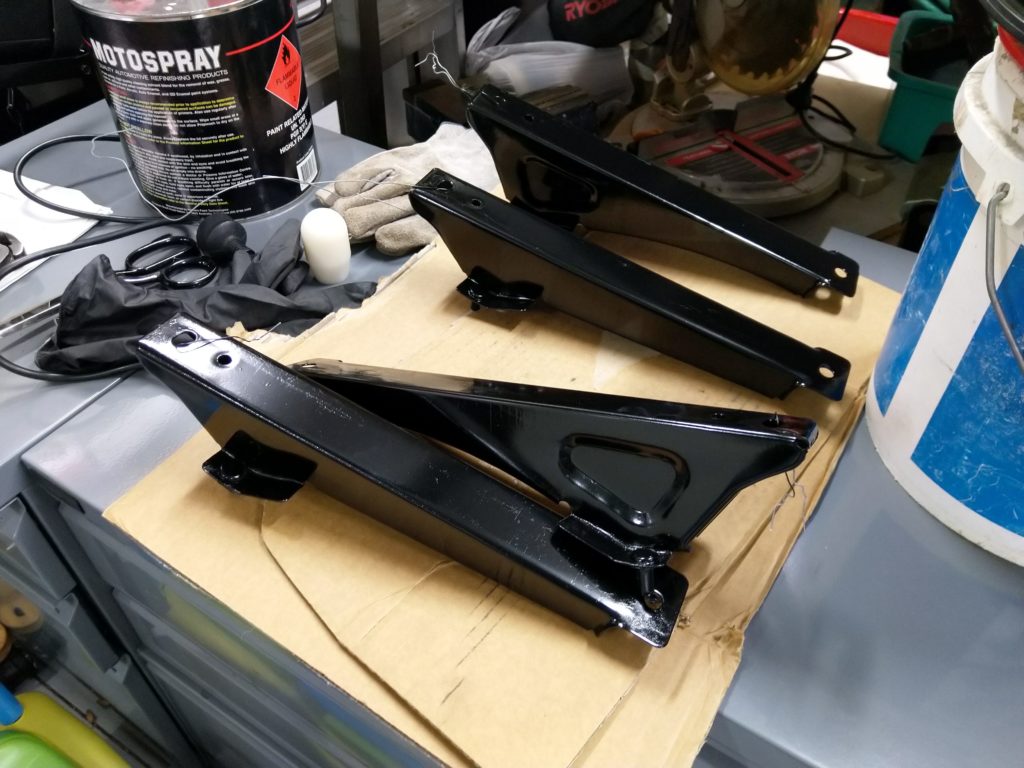
The seat brackets also got the scuff-and-paint treatment.
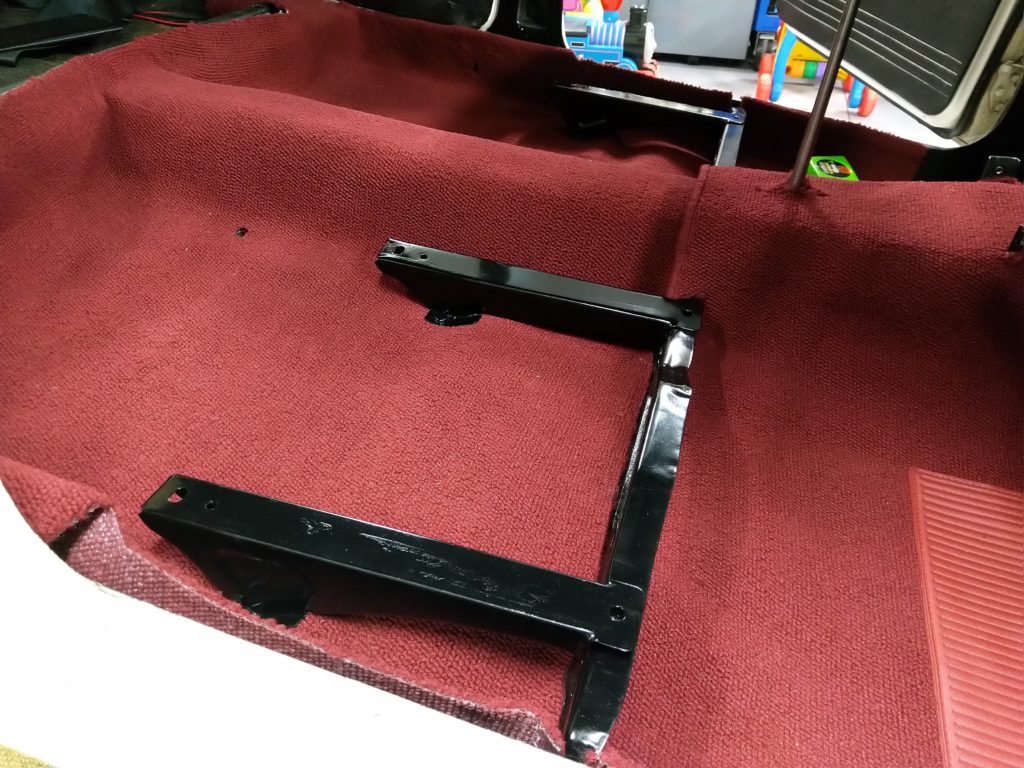
Fresh paint and fresh carpet.
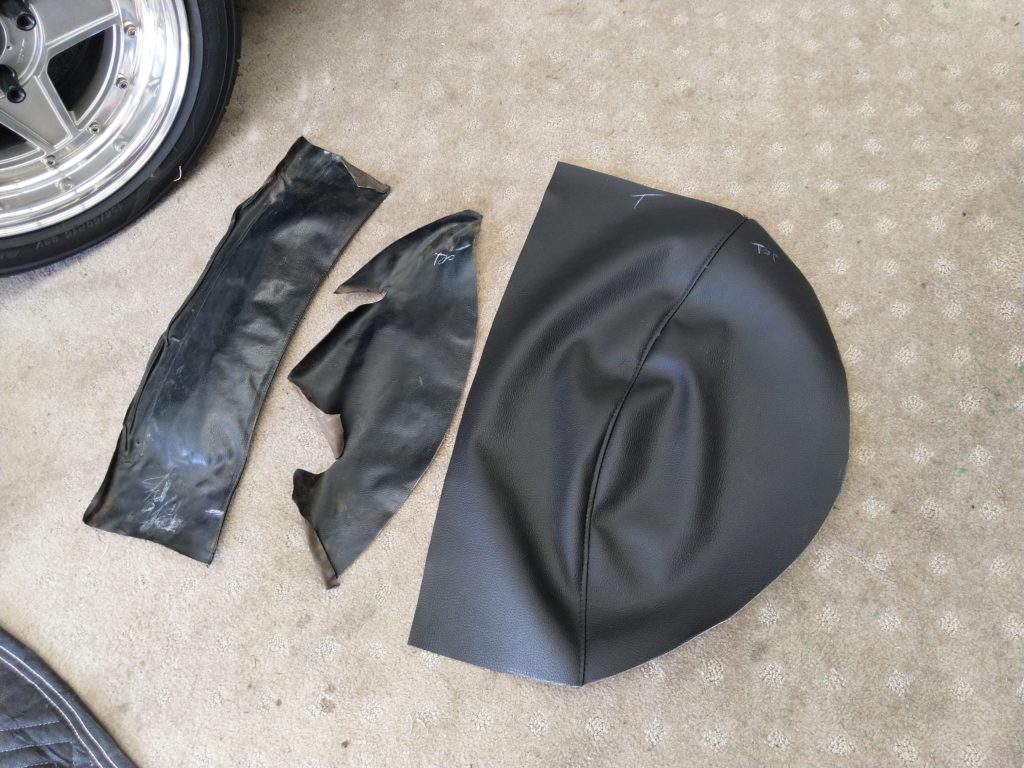
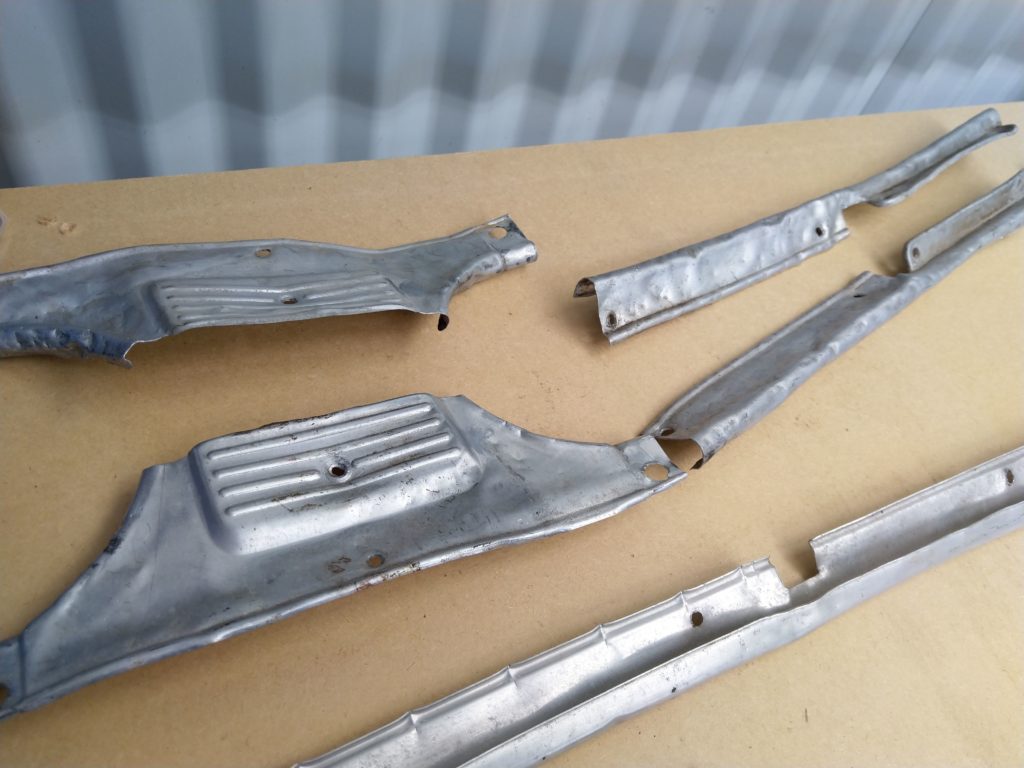
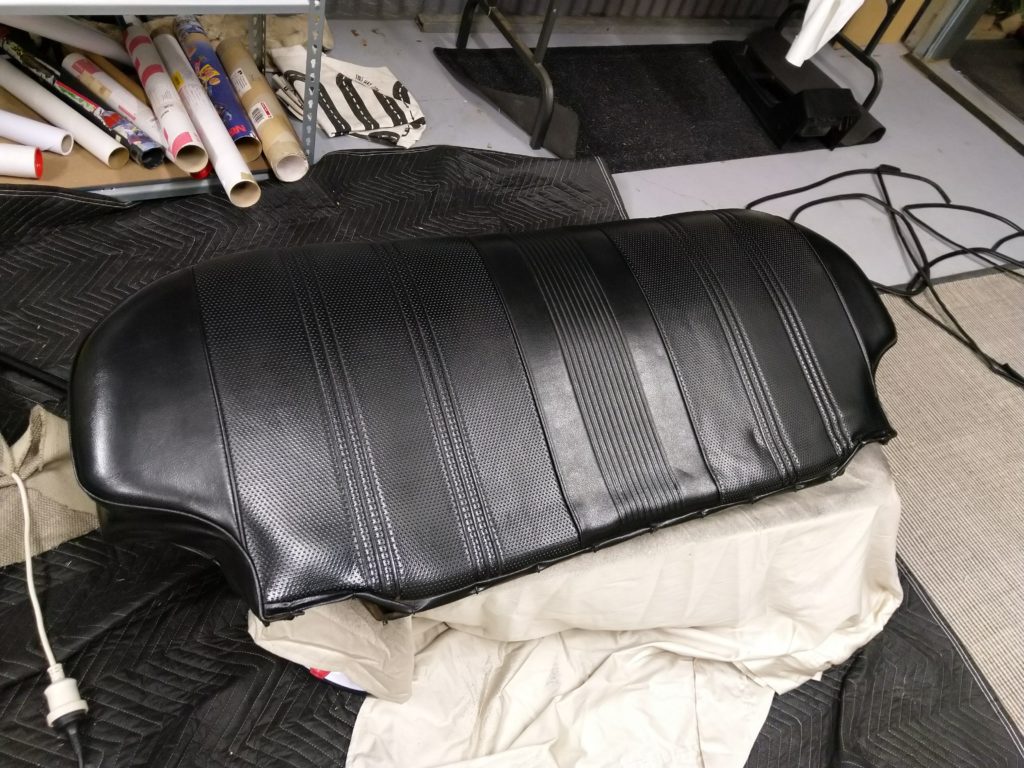
The problem with fitting nice new parts, is that everything else looks terrible! The inner rear wheel tubs are visible in these cars, and covered in vinyl. The old pieces (left) had shrunk and torn, so my dad trimmed up some new ones (right).
The old original scuff plates were very banged up. I ended up gifting these to a fellow Datsun enthusiast who said he will restore them. Gotta share the love!
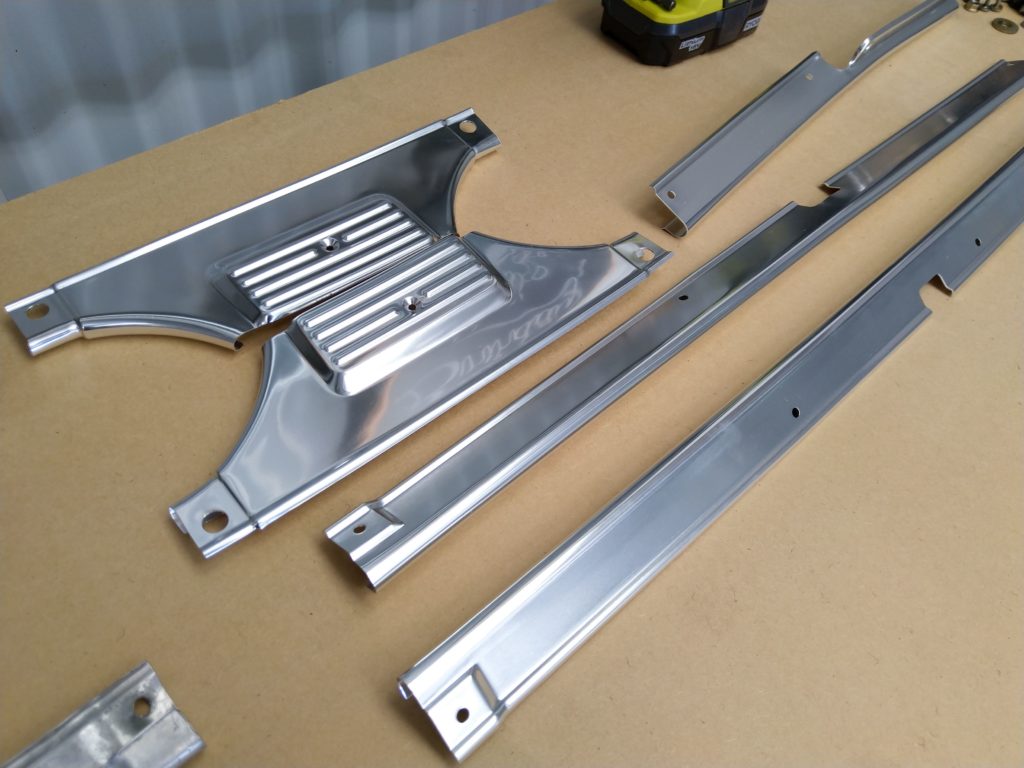
For replacements I decided to go with reproduction items.

The lower half of the b-pillar has a metal trim piece that clips into place. These also received a scuff and coat of satin paint.

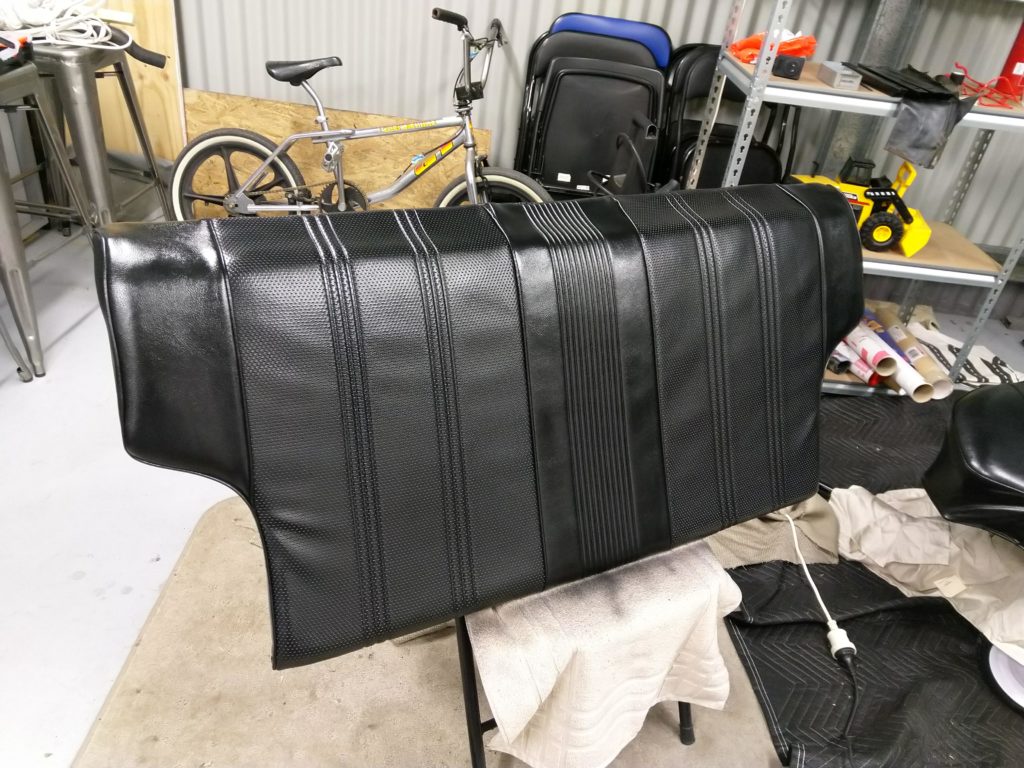
Rear wheel tub vinyl covers in place.

And again.
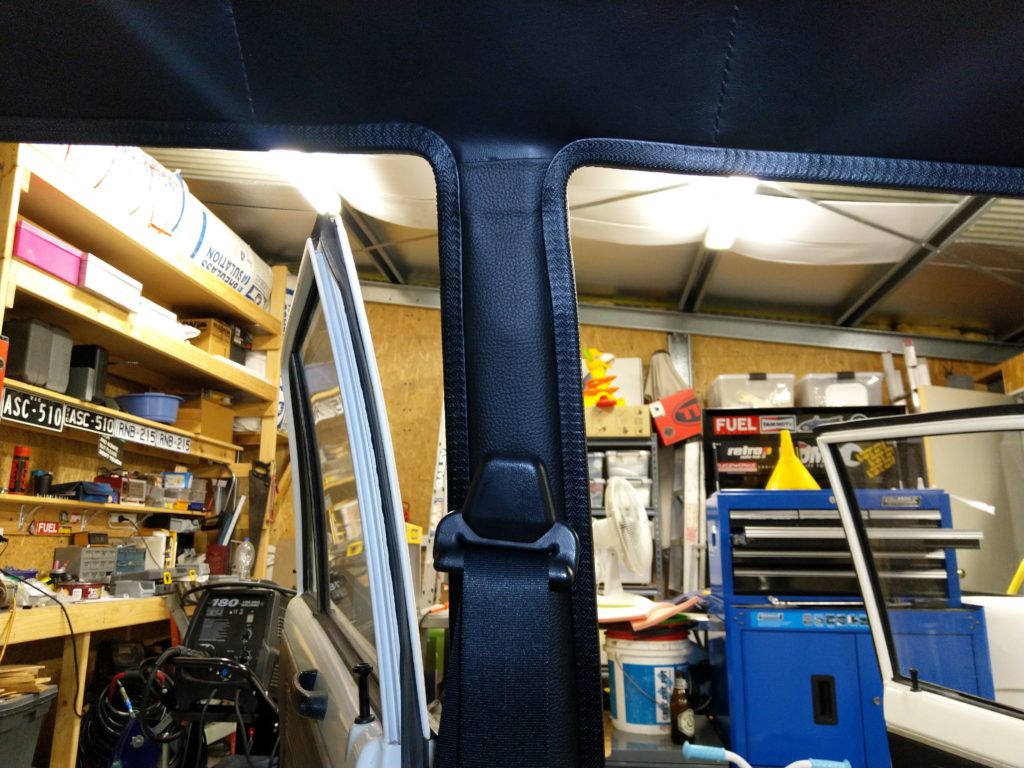
Previously, there was a gap between the headlining and seat belts with no material, and the body colour of the car was exposed. Dad to the rescue yet again with some custom vinyl pieces glued on, with a thin layer of foam underneath.
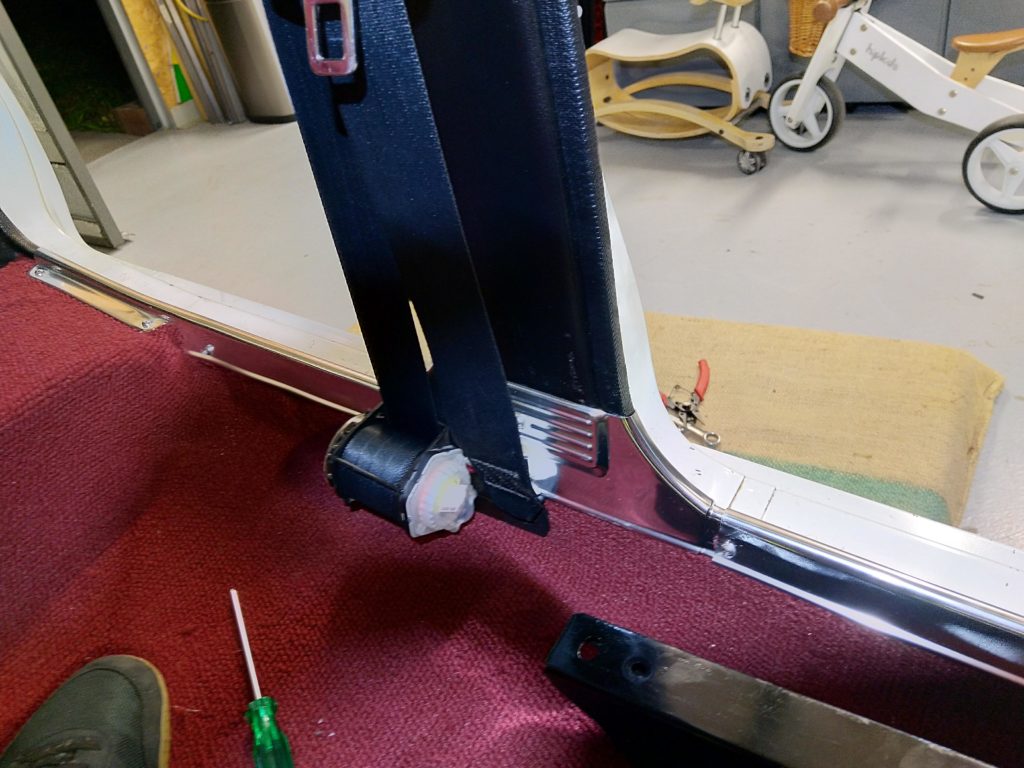
The scuff plates definitely weren’t easy to wrestle into place, as the carpet needs to tuck underneath them. Many sore fingers later saw them affixed with nice new stainless screws.

Old kick panels and new repro replacements.
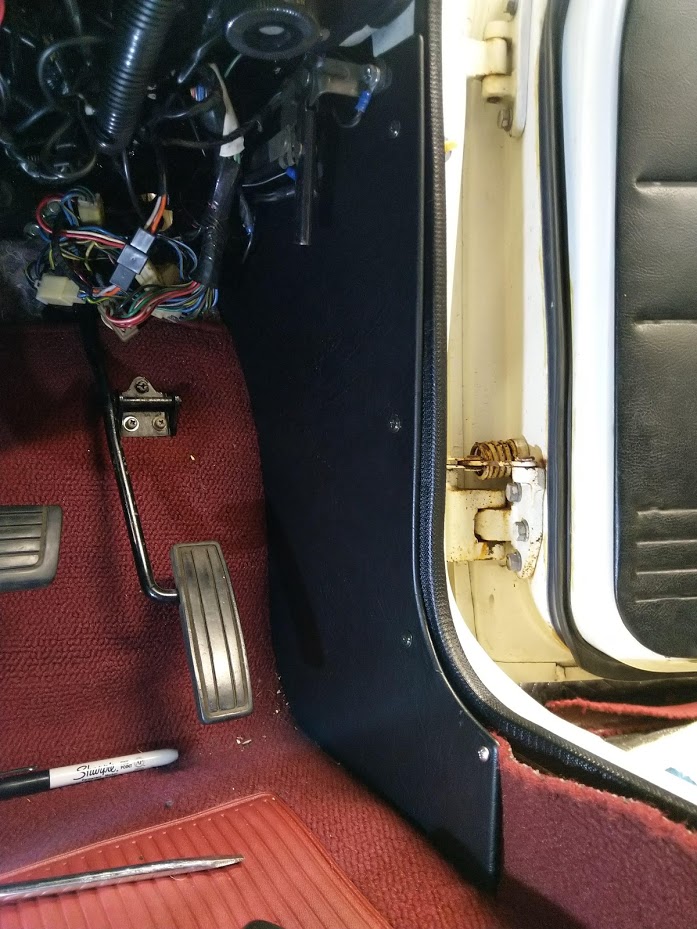
New kick panels in place (before scuff plates). Also note the new pinchweld around the door openings. Also please do not note my ugly door hinges.


Something else that needed a freshen up was the rear seat. I was happy to keep the original item, as it was in fairly good condition with only some minor wear, but it was quite faded. Chris had about half a can of black vinyl dye left over from another project, so we decided to give it a shot and see how it reacted…
Safe to say the results were pleasing! It looks a lot shiner in photos than it does in real life.
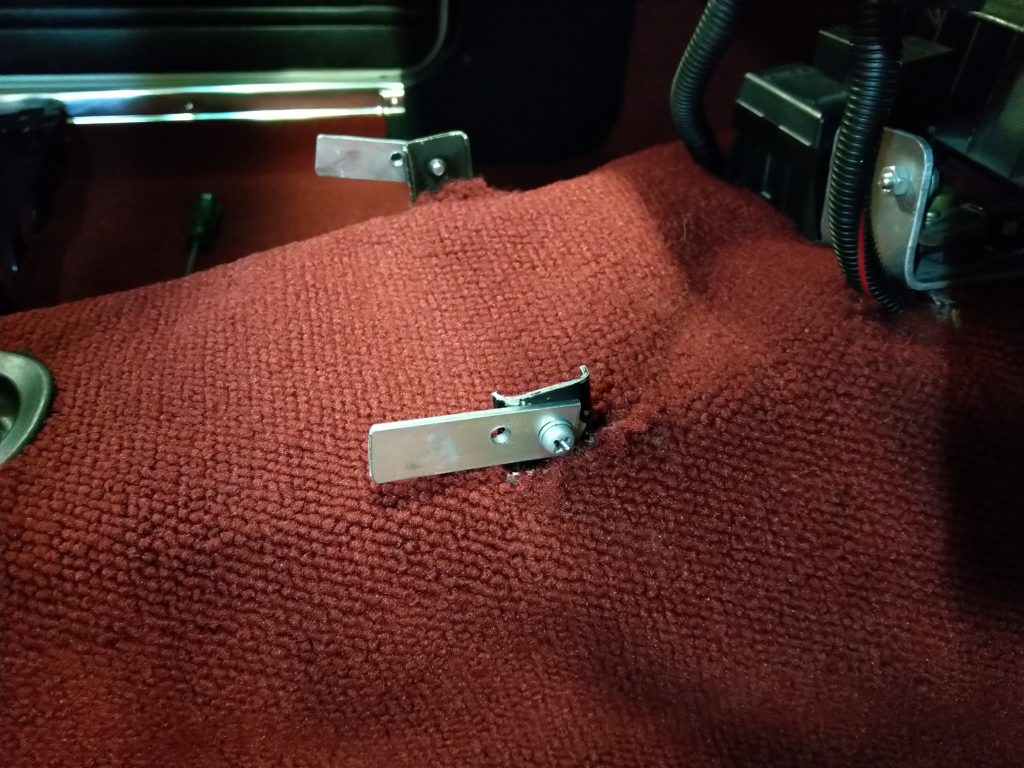
My center console would no longer fit where it used to. The new carpet must have been a bit thicker, or just sat differently. The console is bolted into these verticle brackets that are welded to the tunnel. I quickly fabbed up some aluminium extensions, and tapped a thread into the new holes.

This close-up shows how neatly the soldering iron makes holes in the carpet. This is for the screw holes that locate the rear of the console to the tunnel.

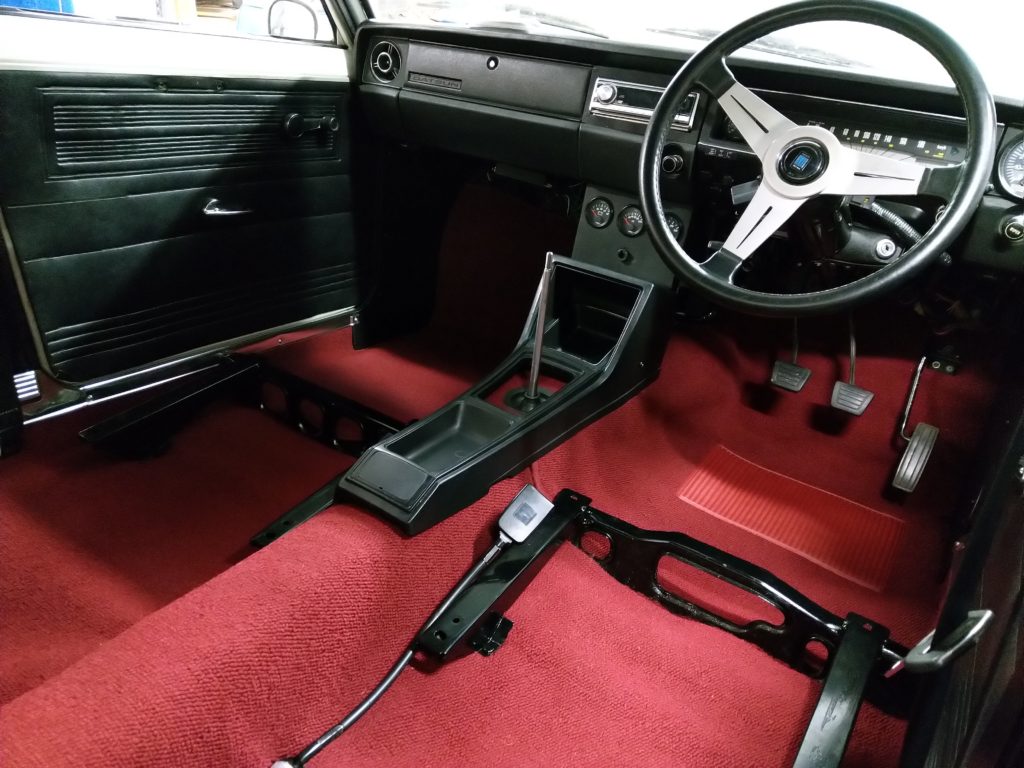
Console firmly in place and the interior starting to look whole again. I bought some black M6 machine screws to screw in the console to it’s new bracket extensions. It’s the little things that count!

Underneath the car, the factory seat brackets used some very old nuts and thin (and warped) washers. These were replaced with some thick galvanised square pieces (thanks again, Chris!). Due to their thickness, we had to scribe and scrape away some of the aftermarket undercoating to enable the nuts to wind up enough on the threads.
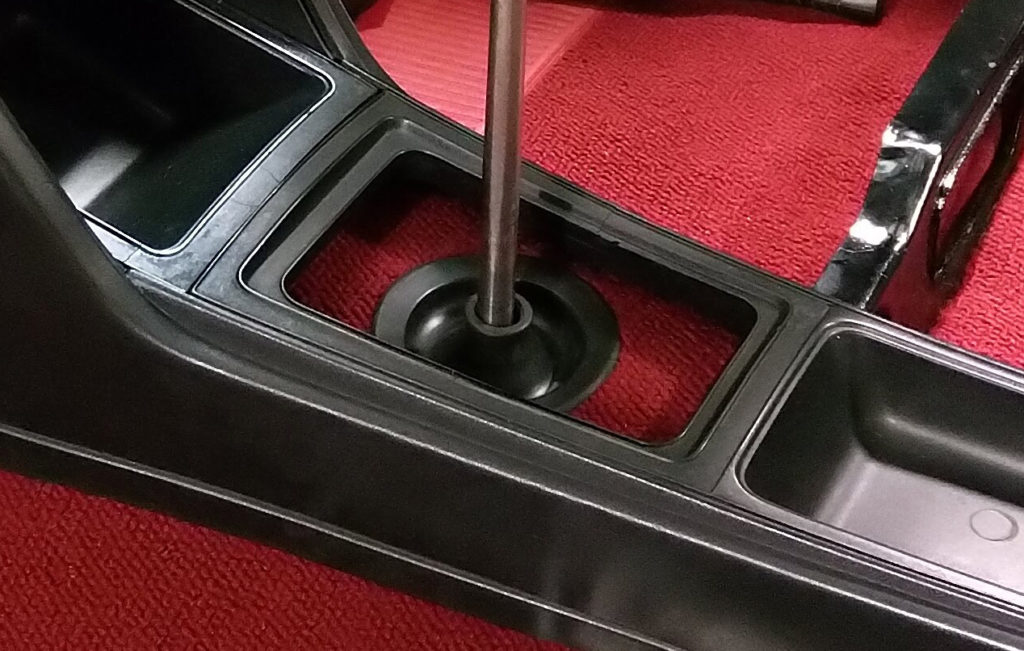
I thought I got lucky with the rubber gear boot, as it appeared to fit perfectly in/around the carpet cut-out for the shifter. While it worked when stationary, once you rowed through the gears it would detach itself and expose the underside of the car.
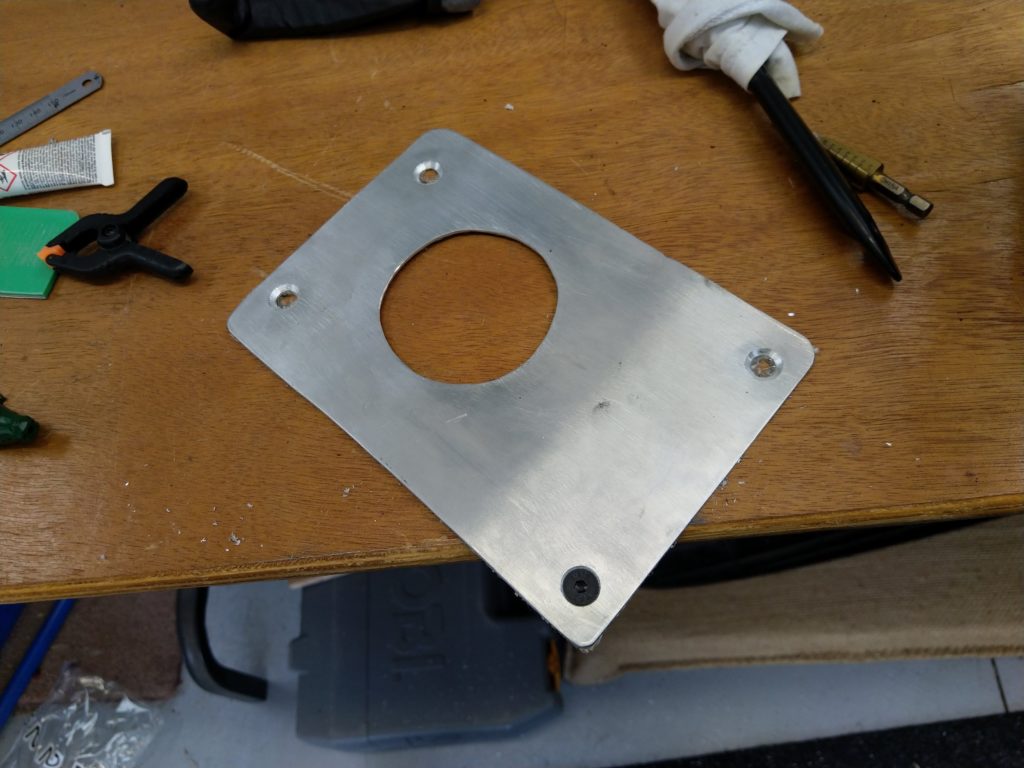
So that means I had to re-use the aluminium plate I made when I installed the billet shifter, but not without some style changes. As you can see above, I’d already started the processs by counter-sinking the holes and trial fitted a black M6 bolt in the bottom corner.
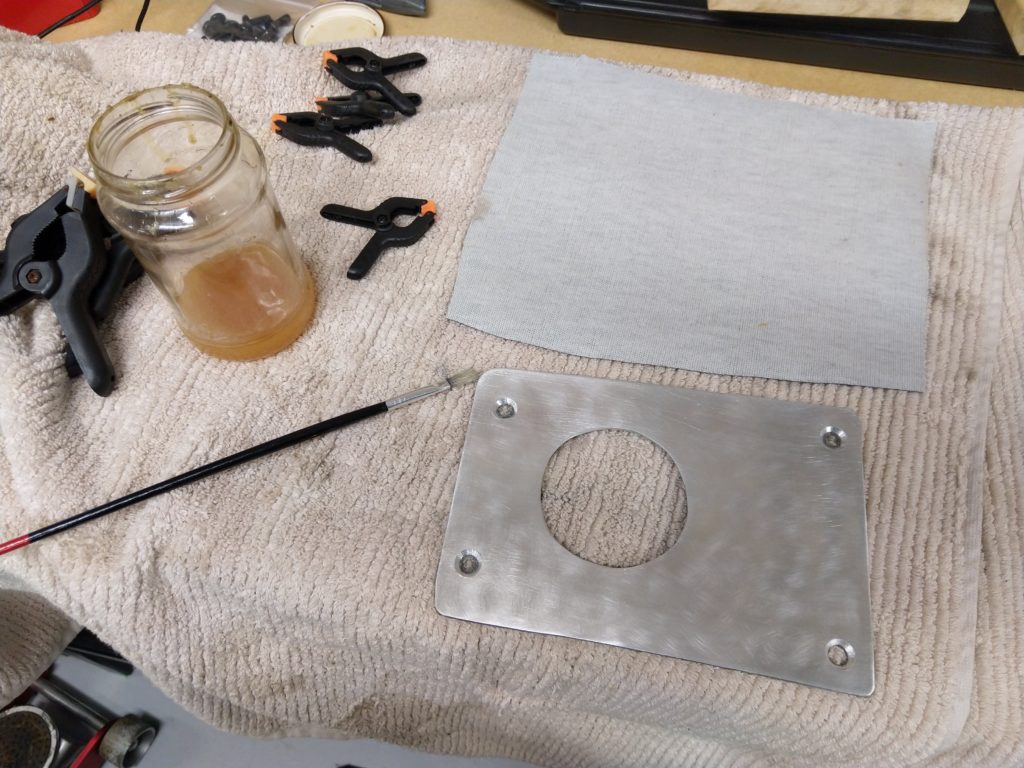
I liked the raw aluminium finish and zinc plated bolts peeking through the console, but now that the interior was shaping up much, much nicer than before, I wanted to hide this piece and make it visually disappear.

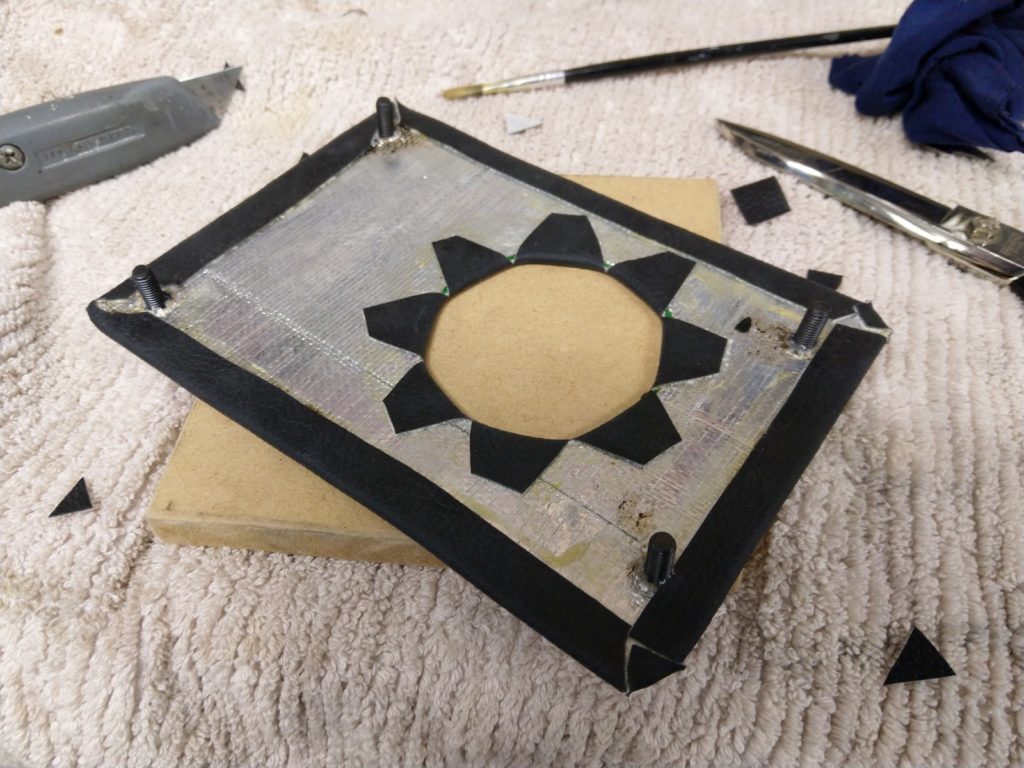
So I took some leftover black vinyl and glued it onto the piece.
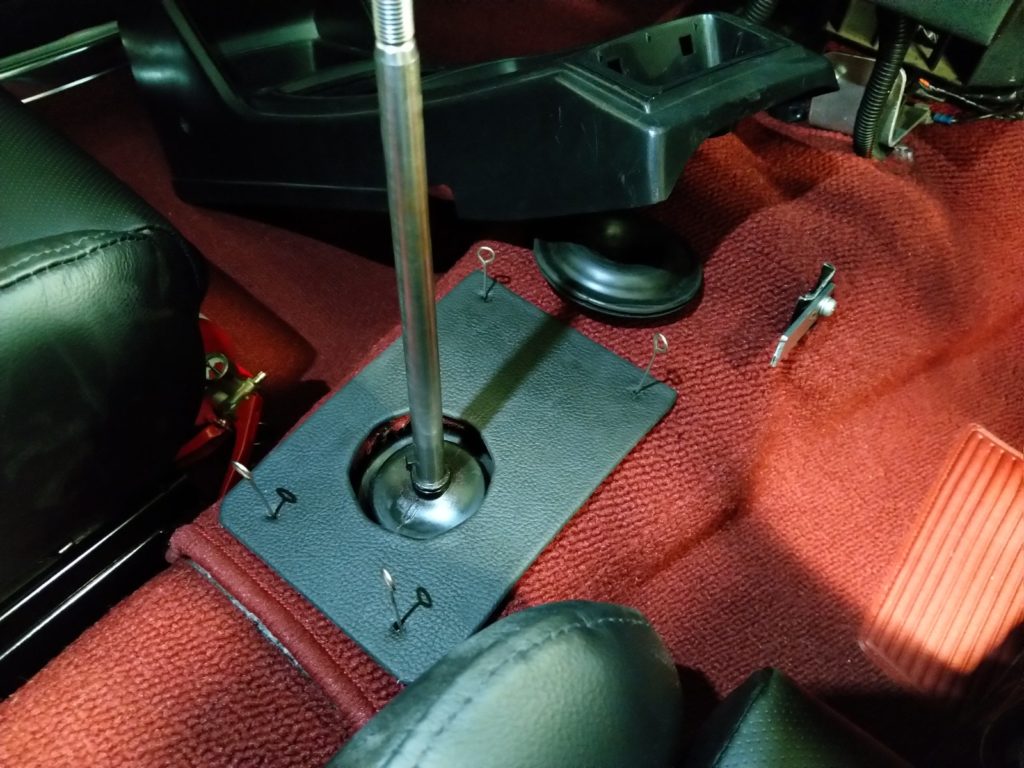
Test fitted by using some pins to locate the 4x nutserts I had previously fitted a few years back.

Once the holes were located, it’s time to get the soldering iron out for some nice, neat holes.
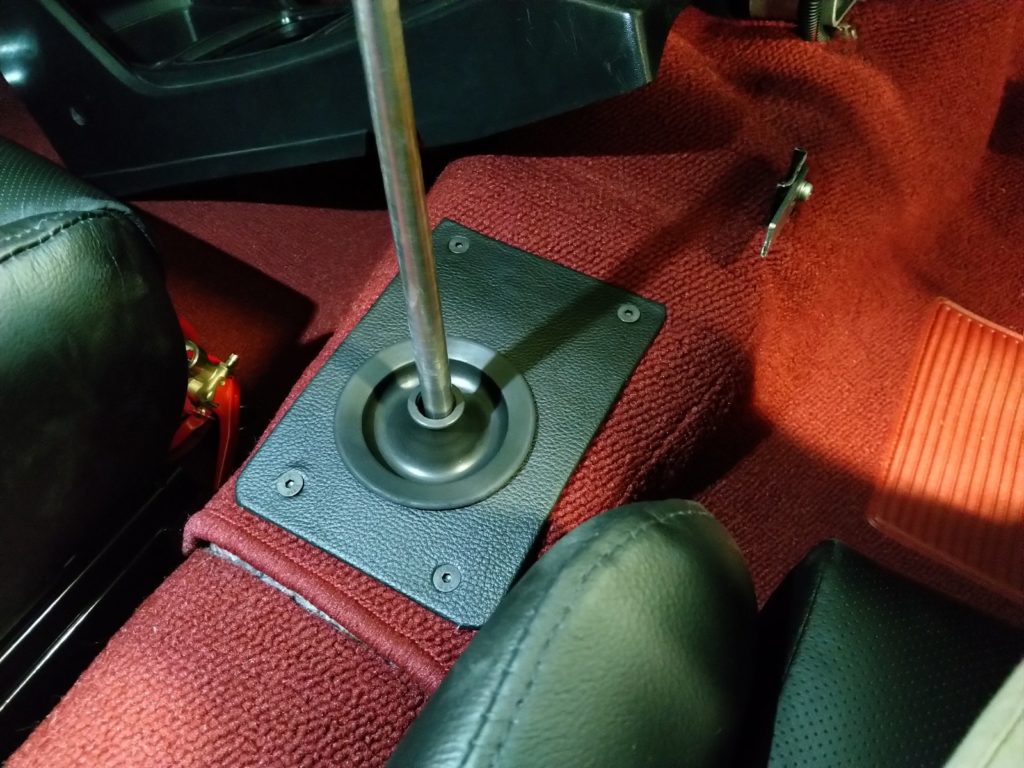
Firmly bolted into place with the minimalist Austin Healy rubber gear boot.
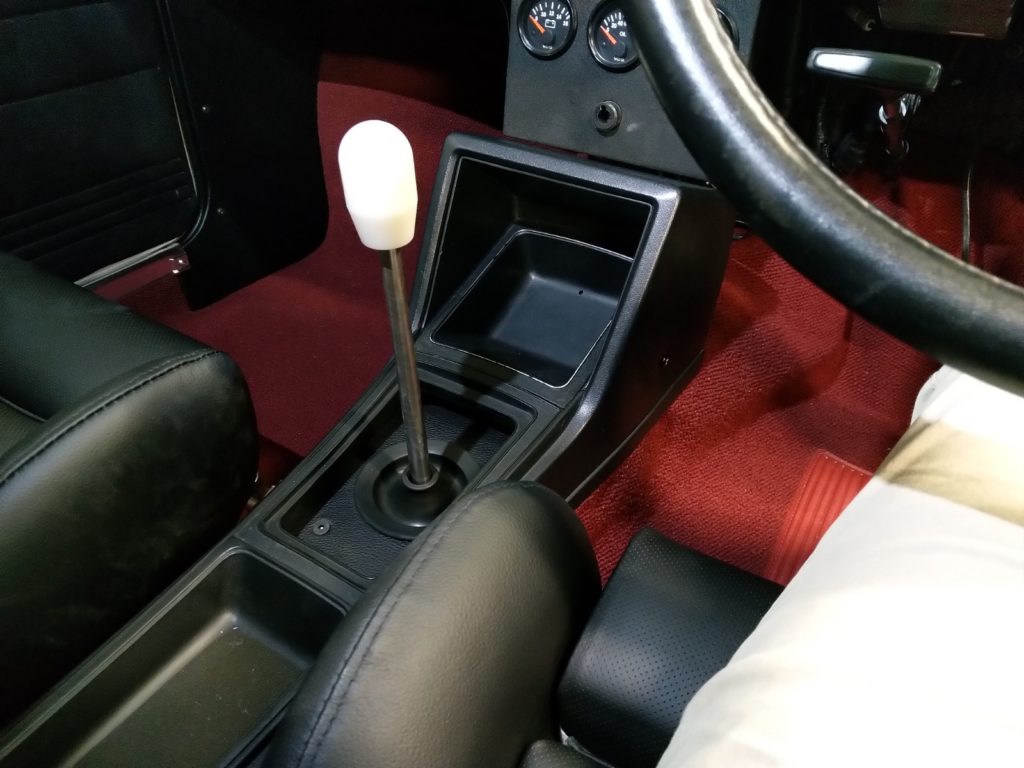
With the console all back in place, it all looks like it was meant to be. It’s even more hidden in real life, as I used a light source to take the above photo. A console restoration is still on my list of future mods, I’m not sure if I’ll repair and repaint, or possibly trim it in matching leather or vinyl.
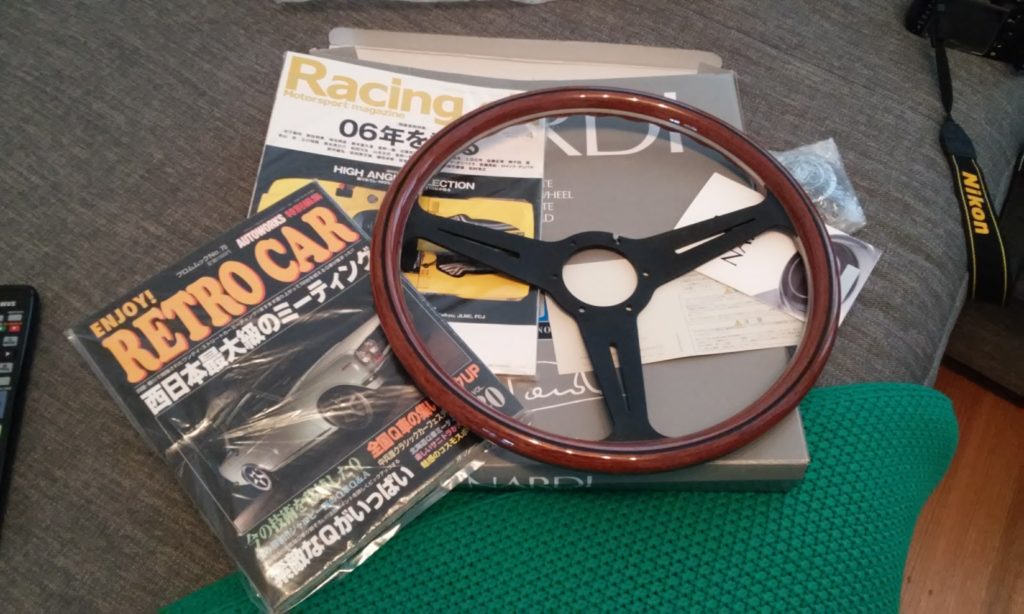
The night before Black Label Invitational (which I’ll save for another post), I blew the dust off something I’d had sitting on my shelf for many years. I bought this brand new woograin Nardi Classic from JDMparts.rupewrecht with money from my 30th birthday. I’m now 34 so I thought it would be a good time to fit it (jokes aside, I was waiting for the eventual interior overhaul). In fact, the above image is actually from 2015.
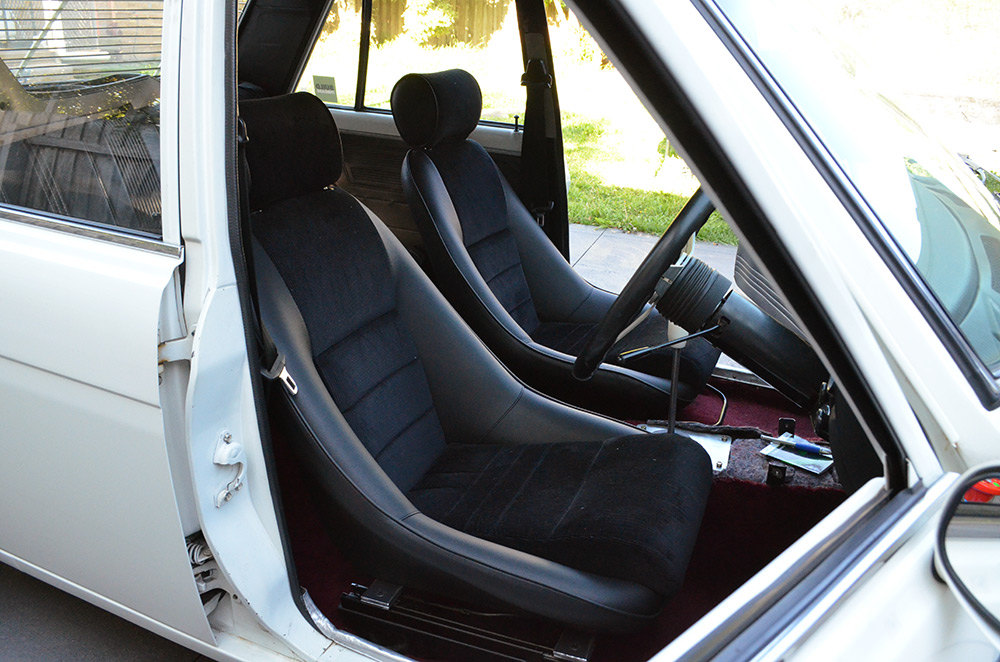
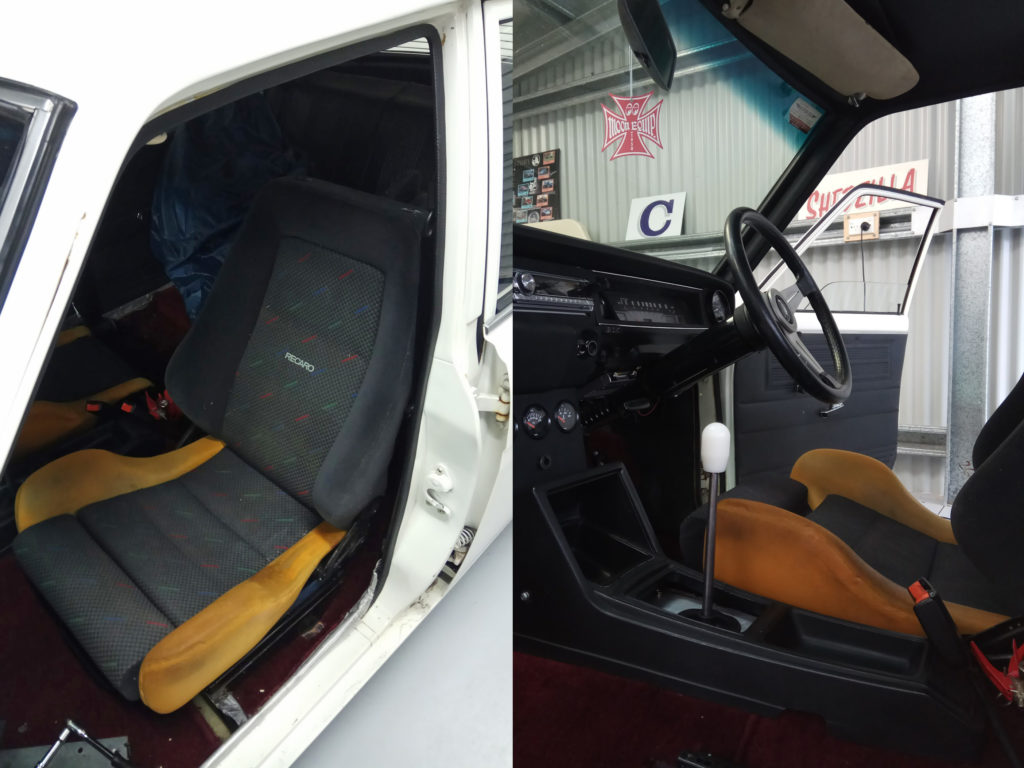
The following images show the finished interior with both steering wheels…


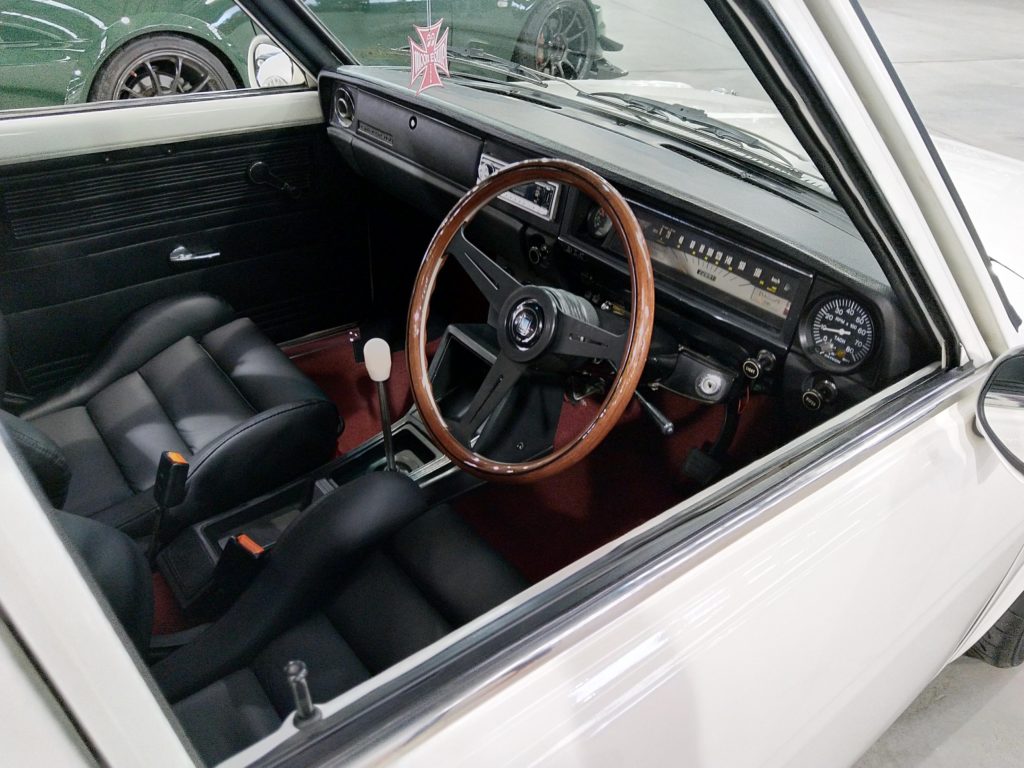
I’m extremely happy with the finished product, the interior has gone from one of the worst to one of the best parts of the car. All that’s left to do is make the new door-trims and relocate the fire extinguisher from the top of the trans tunnel to underneath the passenger seat. I’ll be sure to update when those parts are done, but I didn’t want to hold off on this update any longer. I also have a full set of VDO gauges that will go into a custom dash fascia one day, but that’s not on the cards just yet.
So that makes 4 pairs of seats in the time I’ve owned the car. The whole premise of doing things more than once is a running theme with this project, and you’ll hear more about that in a future post, as there’s plenty more to come over the next decade of ownership!